Blog

  • How to Manage Stress: Practical Techniques for Everyday Life

    How to Manage Stress: Practical Techniques for Everyday Life

    In today’s fast-paced world, knowing how to manage stress effectively is crucial for maintaining both mental and physical health. This comprehensive guide will provide you with practical techniques to manage stress in your everyday life, helping you to feel more balanced, productive, and content.

    1. Understanding Stress: The First Step to Managing It

    Before we dive into techniques to manage stress, it’s important to understand what stress is and how it affects us:

    • Stress is the body’s natural response to challenges or demands
    • Short-term stress can be motivating, but chronic stress can be harmful
    • Common symptoms include irritability, fatigue, and difficulty concentrating
    • Recognizing your personal stress triggers is key to managing them

    2. Breathing Techniques to Reduce Stress Quickly

    One of the simplest and most effective ways to manage stress is through controlled breathing:

    The 4-7-8 Breathing Technique:

    1. Inhale quietly through your nose for 4 seconds
    2. Hold your breath for 7 seconds
    3. Exhale completely through your mouth for 8 seconds
    4. Repeat this cycle 4 times

    Practice this technique daily to help manage stress levels and promote relaxation.

    3. Incorporating Physical Activity to Manage Stress

    Regular exercise is a powerful stress-management tool:

    • Aim for at least 30 minutes of moderate exercise most days
    • Choose activities you enjoy, such as walking, swimming, or dancing
    • Consider yoga or tai chi for a mind-body approach to stress management
    • Even short bursts of activity can help manage stress throughout the day

    4. Mindfulness and Meditation: Powerful Stress-Management Tools

    Practicing mindfulness and meditation can significantly reduce stress levels:

    Simple Mindfulness Exercise:

    1. Find a quiet place and sit comfortably
    2. Focus on your breath, noticing the sensation of inhaling and exhaling
    3. When your mind wanders, gently bring your attention back to your breath
    4. Start with 5 minutes daily and gradually increase

    Regular practice can help you manage stress more effectively in your daily life.

    5. Time Management Strategies to Reduce Stress

    Poor time management often leads to increased stress. Try these techniques:

    • Prioritize tasks using the Eisenhower Matrix (urgent/important)
    • Break large projects into smaller, manageable steps
    • Use a planner or digital app to keep track of commitments
    • Learn to say “no” to non-essential tasks
    • Schedule regular breaks to prevent burnout

    6. Nutrition and Hydration: Managing Stress Through Diet

    What you eat and drink can significantly impact your ability to manage stress:

    • Limit caffeine and alcohol, which can exacerbate stress
    • Stay hydrated – dehydration can increase stress hormone levels
    • Eat a balanced diet rich in fruits, vegetables, and whole grains
    • Consider stress-reducing foods like dark chocolate, nuts, and fatty fish

    7. Creating a Stress-Management Routine

    Develop a daily routine to help manage stress more effectively:

    1. Start your day with a few minutes of deep breathing or meditation
    2. Take short breaks throughout the day to stretch or practice mindfulness
    3. Engage in physical activity, even if it’s just a brief walk
    4. End your day with a relaxing activity, like reading or listening to music
    5. Maintain a consistent sleep schedule to support stress management

    8. Social Connections: Managing Stress Through Relationships

    Strong social connections can help you manage stress more effectively:

    • Reach out to friends and family regularly
    • Join clubs or groups related to your interests
    • Consider volunteering – helping others can reduce your own stress
    • Don’t hesitate to seek professional help if stress becomes overwhelming

    9. Workplace Stress Management Techniques

    Many of us experience significant stress at work. Try these strategies:

    • Set clear boundaries between work and personal time
    • Take regular breaks, even short ones, to reset your mind
    • Practice good posture and ergonomics to reduce physical stress
    • Communicate openly with colleagues and supervisors about workload
    • Use stress-management techniques like deep breathing during tense moments

    Conclusion: Mastering Stress Management for a Healthier Life

    Learning how to manage stress effectively is a lifelong process, but the benefits are immense. By incorporating these techniques into your daily routine, you can reduce the negative impacts of stress on your physical and mental health. Remember, everyone’s stress management needs are different, so be patient and experiment to find what works best for you.

    As you become more adept at managing stress, you may find that you’re not only happier and healthier, but also more productive and resilient in the face of life’s challenges. Keep practicing these techniques, and don’t hesitate to seek additional support when needed. Here’s to a less stressful, more balanced life!

    Image by freepik

  • How to Start a Vegetable Garden

    How to Start a Vegetable Garden

    Starting a vegetable garden is a rewarding way to grow your own fresh, healthy produce. Whether you have a spacious backyard or just a few containers on a balcony, this guide will teach you how to start a vegetable garden from scratch. We’ll cover everything from planning and soil preparation to planting and maintenance.

    1. Planning Your First Vegetable Garden

    Before you start digging, it’s crucial to plan your vegetable garden:

    • Choose a location: Most vegetables need 6-8 hours of direct sunlight daily.
    • Decide on size: Start small to avoid overwhelming yourself.
    • Select vegetables: Choose crops you enjoy eating and that grow well in your climate.
    • Consider a raised bed: This can improve drainage and make gardening easier on your back.

    2. Preparing the Soil for Your Vegetable Garden

    Good soil is the foundation of a successful vegetable garden:

    1. Test your soil: Use a home testing kit or send a sample to a local extension office.
    2. Clear the area: Remove grass, weeds, and debris.
    3. Improve soil quality: Add organic matter like compost or well-rotted manure.
    4. Loosen the soil: Use a tiller or garden fork to a depth of 12-14 inches.

    3. Choosing Vegetables for Your New Garden

    When starting a vegetable garden, consider these beginner-friendly crops:

    • Tomatoes
    • Lettuce and other leafy greens
    • Zucchini and summer squash
    • Peppers
    • Beans
    • Radishes
    • Carrots

    4. Planting Your Vegetable Garden: Seeds vs. Seedlings

    You can start your vegetable garden with seeds or seedlings:

    Starting from Seeds:

    • More economical
    • Wider variety of plants available
    • Requires more time and care

    Starting from Seedlings:

    • Faster results
    • Easier for beginners
    • More expensive than seeds

    5. Watering and Fertilizing Your New Vegetable Garden

    Proper watering and fertilization are key to a thriving vegetable garden:

    Watering Tips:

    • Water deeply and less frequently to encourage deep root growth.
    • Water early in the morning to reduce evaporation.
    • Use mulch to retain moisture and suppress weeds.

    Fertilizing Tips:

    • Use a balanced, organic fertilizer.
    • Follow package instructions for application rates.
    • Avoid over-fertilizing, which can harm plants and pollute waterways.

    6. Managing Pests in Your Vegetable Garden

    Protect your vegetable garden from pests with these strategies:

    • Practice crop rotation to disrupt pest life cycles.
    • Encourage beneficial insects like ladybugs and praying mantises.
    • Use physical barriers like row covers or netting.
    • Consider companion planting to deter pests naturally.
    • As a last resort, use organic pesticides sparingly and carefully.

    7. Harvesting from Your Vegetable Garden

    Enjoying the fruits of your labor is the best part of starting a vegetable garden:

    • Harvest vegetables when they’re ripe for the best flavor and nutrition.
    • Pick frequently to encourage continued production.
    • Use clean, sharp tools to avoid damaging plants.
    • Store or preserve excess produce for later use.

    8. Maintaining Your Vegetable Garden Throughout the Season

    Keep your vegetable garden thriving with regular maintenance:

    • Weed regularly to prevent competition for nutrients and water.
    • Monitor for signs of disease and address issues promptly.
    • Prune and stake plants as needed for proper growth.
    • Keep a garden journal to track successes and learn from challenges.

    9. Expanding Your Vegetable Garden: Next Steps

    Once you’ve mastered the basics of starting a vegetable garden, consider these advanced techniques:

    • Try succession planting for continuous harvests.
    • Experiment with vertical gardening to maximize space.
    • Learn about season extension techniques like cold frames or hoop houses.
    • Save seeds from your best-performing plants for next year’s garden.

    Conclusion: Enjoying the Rewards of Your Vegetable Garden

    Starting a vegetable garden is a fulfilling journey that connects you with nature and provides fresh, nutritious food for your table. Remember, gardening is a learning process, so don’t be discouraged by setbacks. With patience, care, and the knowledge you’ve gained from this guide, you’ll be well on your way to growing a bountiful vegetable garden. Happy gardening!

    Now that you know how to start a vegetable garden, why not share your harvest with friends and family or explore preserving techniques to enjoy your homegrown produce year-round? The possibilities are endless when you grow your own food!

    Image by freepik

  • How to Build a Simple Bookshelf

    How to Build a Simple Bookshelf

    Are you looking to add some storage space to your home while also flexing your DIY muscles? Building a simple bookshelf is an excellent project for beginners and experienced craftspeople alike. This guide will walk you through the process of how to build a simple bookshelf that’s both functional and attractive. With some basic tools and materials, you’ll have a custom piece of furniture in no time!

    1. Essential Materials and Tools for Building Your Simple Bookshelf

    Before you start, make sure you have all the necessary materials and tools. Here’s what you’ll need to build a simple bookshelf:

    Materials:

    • 1 sheet of 3/4″ plywood (4′ x 8′)
    • 1″ x 2″ pine boards for trim (about 20 linear feet)
    • Wood glue
    • 1-1/4″ wood screws
    • Wood filler
    • Sandpaper (medium and fine grit)
    • Paint or wood stain of your choice

    Tools:

    • Circular saw or table saw
    • Drill with screwdriver bits
    • Measuring tape
    • Carpenter’s square
    • Clamps
    • Safety goggles and dust mask

    2. Designing Your Simple Bookshelf: Planning for Success

    Before you start cutting wood, it’s important to plan your bookshelf design. For this simple bookshelf, we’ll create a design with the following dimensions:

    • Height: 48 inches
    • Width: 36 inches
    • Depth: 12 inches
    • Number of shelves: 3 adjustable shelves plus top and bottom

    These dimensions will create a versatile bookshelf that can hold books of various sizes. Feel free to adjust the measurements to suit your specific needs.

    3. Cutting Wood for Your DIY Bookshelf Project

    Now that you have your design, it’s time to cut the wood. Here’s a breakdown of the pieces you’ll need to build a simple bookshelf:

    • 2 side panels: 48″ x 12″
    • Top and bottom panels: 36″ x 12″
    • 3 adjustable shelves: 35-1/4″ x 11-1/4″ (slightly smaller to fit inside the frame)
    • 1 back panel: 47-1/4″ x 35-1/4″

    Use your circular saw or table saw to cut these pieces from the plywood sheet. Remember to wear safety goggles and a dust mask while cutting.

    4. Step-by-Step Assembly of Your Simple Bookshelf Frame

    Now that you have all your pieces cut, it’s time to assemble the frame of your simple bookshelf:

    1. Apply wood glue to the edges of the top and bottom panels where they’ll meet the side panels.
    2. Attach the top and bottom panels to the side panels using clamps to hold them in place.
    3. Pre-drill holes and secure the joints with wood screws.
    4. Attach the back panel to the frame using wood glue and screws around the perimeter.

    5. Installing Shelves in Your Homemade Bookshelf

    To create adjustable shelves for your simple bookshelf:

    1. Measure and mark shelf support positions on the inside of the side panels. Space them evenly, about 6-8 inches apart.
    2. Install shelf supports or drill holes for shelf pins.
    3. Place the cut shelves onto the supports or pins.

    6. Finishing Your DIY Bookshelf: Final Touches

    Now that the basic structure is complete, it’s time to add the finishing touches:

    1. Use wood filler to cover any screw holes or imperfections.
    2. Once the wood filler is dry, sand the entire bookshelf smooth, starting with medium-grit sandpaper and finishing with fine-grit.
    3. Wipe away all dust with a tack cloth.
    4. Apply your chosen paint or wood stain according to the product instructions.
    5. Once the finish is dry, attach the 1″ x 2″ pine boards as trim to the front edges of the bookshelf for a polished look.

    7. Expert Tips for Building a Sturdy Simple Bookshelf

    • Measure twice, cut once to avoid wasting materials.
    • Use a carpenter’s square to ensure your cuts and assemblies are square.
    • Pre-drill holes before inserting screws to prevent the wood from splitting.
    • Sand in the direction of the wood grain for the smoothest finish.
    • Consider adding L-brackets for extra support if your bookshelf will hold heavy items.

    8. Customizing Your Handmade Bookshelf Design

    Once you know how to build a simple bookshelf, you can easily customize the design to fit your needs:

    • Adjust the dimensions to fit your space perfectly.
    • Add more shelves for additional storage.
    • Install cabinet doors on the lower portion for hidden storage.
    • Use decorative molding instead of simple trim for a more elegant look.
    • Paint designs or patterns on the back panel for a pop of color.

    Conclusion: Enjoying Your Newly Built Simple Bookshelf

    Learning how to build a simple bookshelf is a rewarding DIY project that can save you money and give you a custom piece of furniture. With these step-by-step instructions, you’ll be able to create a functional and attractive bookshelf that fits your space and style perfectly. Remember to take your time, measure carefully, and prioritize safety throughout the process. Happy building!

    Now that you know how to build a simple bookshelf, why not tackle more advanced woodworking projects? With each project, you’ll gain skills and confidence in your DIY abilities. Enjoy your new bookshelf and the satisfaction of having built it yourself!

    Image by freepik

  • How to Remove Carpet Stains

    How to Remove Carpet Stains

    Keeping your carpets clean can be a challenge, especially when faced with tough stains. This comprehensive guide will teach you how to remove carpet stains effectively, whether you’re dealing with a recent spill or a set-in mark. We’ll cover various types of stains and provide both DIY solutions and professional tips to help you restore your carpet to its former glory.

    1. Quick Action: The Key to Successful Carpet Stain Removal

    When it comes to carpet stains, time is of the essence. The longer a stain sits, the harder it becomes to remove. Here’s why acting fast is crucial:

    • Prevents the stain from setting: Fresh stains are easier to treat before they bond with carpet fibers.
    • Reduces spreading: Quick action minimizes the affected area.
    • Increases chances of complete removal: Addressing the stain immediately improves the likelihood of full elimination.

    As soon as you notice a spill or stain, grab a clean white cloth or paper towels and start blotting (not rubbing) the area to absorb as much of the liquid as possible.

    2. Identifying Carpet Stains: Tailoring Your Stain Removal Approach

    Different stains require different treatment methods. Here are some common types of carpet stains and how to identify them:

    • Food and beverage stains: Often colorful and may have a distinct odor.
    • Oil-based stains: Leave a greasy residue and darken the carpet.
    • Pet stains: Usually have a strong odor and may discolor the carpet.
    • Ink stains: Appear as dark, concentrated spots.
    • Mud and dirt: Leave a brown or gray residue that may be crusty when dry.

    Identifying the stain type will help you choose the most effective method to remove carpet stains.

    3. General Steps for Removing Carpet Stains

    While specific stains may require unique treatments, these general steps apply to most carpet stains:

    1. Blot the stain: Use a clean, white cloth to blot from the outside of the stain towards the center. This prevents spreading.
    2. Prepare a cleaning solution: Mix a quarter teaspoon of mild dish soap with a cup of warm water.
    3. Apply the solution: Dab the cleaning solution onto the stain using a clean cloth. Avoid saturating the carpet.
    4. Blot again: Use a dry cloth to blot and lift the stain.
    5. Rinse: Apply clean water to the area and blot to remove any soap residue.
    6. Dry: Place a stack of paper towels or a clean, dry cloth on the area and weigh it down. Leave it for several hours or overnight to absorb moisture.

    4. Techniques for Eliminating Specific Carpet Stains

    Now, let’s delve into techniques for removing specific types of tough stains:

    Removing Red Wine Stains from Carpet

    1. Blot up as much wine as possible.
    2. Apply a mixture of dish soap, white vinegar, and warm water.
    3. Blot with a clean cloth, alternating with clean water to rinse.
    4. If the stain persists, try a mixture of baking soda and water to form a paste. Apply, let dry, and vacuum.

    Extracting Coffee Stains from Carpet

    1. Blot up excess coffee.
    2. Mix equal parts white vinegar and water, apply to the stain.
    3. Blot with a clean cloth and repeat if necessary.
    4. Rinse with clean water and blot dry.

    Treating Pet Stains on Carpet

    1. Blot up as much of the accident as possible.
    2. Apply a pet odor neutralizer according to product instructions.
    3. For set-in stains, use a mixture of equal parts water and white vinegar.
    4. Blot the area, rinse with clean water, and blot dry.
    5. Consider using an enzyme cleaner specifically designed for pet stains.

    Tackling Ink Stains on Carpet

    1. Apply rubbing alcohol to a cloth and dab the stain.
    2. Blot with a clean, dry cloth to lift the ink.
    3. Repeat until the ink is no longer transferring to the cloth.
    4. Rinse with clean water and blot dry.

    Addressing Grease and Oil Stains on Carpet

    1. Sprinkle baking soda or cornstarch on the stain and let it sit for 15-20 minutes.
    2. Vacuum up the powder.
    3. Apply a small amount of dish soap directly to the stain and work it in gently.
    4. Blot with a damp cloth, rinse, and blot dry.

    5. DIY Solutions to Remove Carpet Stains

    While commercial carpet cleaners are available, you can often achieve great results with household items. Here are some effective DIY solutions:

    Vinegar and Baking Soda Method

    • Mix equal parts white vinegar and water in a spray bottle.
    • Sprinkle baking soda over the stain.
    • Spray the vinegar solution onto the baking soda.
    • Let it fizz and sit for several hours.
    • Blot with a clean cloth and vacuum once dry.

    Hydrogen Peroxide and Dish Soap Solution

    • Mix 1 part hydrogen peroxide with 1 part dish soap.
    • Apply to the stain and let sit for 10-15 minutes.
    • Blot with a damp cloth, rinse, and blot dry.

    Note: Test this solution on an inconspicuous area first, as it may lighten some carpet colors.

    Salt and Club Soda Technique

    • Pour club soda onto the stain and blot.
    • Sprinkle salt over the area and let it absorb the liquid.
    • Vacuum once dry.

    6. Professional Tips for Stubborn Carpet Stains

    Sometimes, despite your best efforts, a stain may prove too stubborn for DIY methods. Here are some professional tips to keep in mind:

    • Always test cleaning solutions on an inconspicuous area first.
    • Use white cloths or paper towels to avoid color transfer.
    • Work from the outside of the stain towards the center to prevent spreading.
    • Avoid over-wetting the carpet, as this can damage the backing and padding.
    • Consider renting a carpet cleaning machine for deep-set stains.
    • Know when to call a professional: If a stain persists after multiple attempts or if you’re dealing with large or valuable carpets, it may be time to consult a professional carpet cleaner.

    7. Preventing Future Carpet Stains

    While accidents happen, there are steps you can take to minimize the risk of future carpet stains:

    • Implement a no-shoes policy indoors.
    • Place doormats at all entrances.
    • Apply a carpet protector spray to create a barrier against stains.
    • Clean spills immediately, even if they’re just water.
    • Vacuum regularly to prevent dirt from settling into carpet fibers.
    • Consider professional carpet cleaning annually to maintain your carpet’s appearance and longevity.

    8. When to Consider Carpet Replacement

    Sometimes, despite your best efforts to remove carpet stains, a stain may be impossible to eliminate completely. If you’ve tried multiple methods and the stain persists, or if your carpet has multiple stubborn stains, it might be time to consider replacement. Signs that it’s time for new carpet include:

    • Persistent odors even after cleaning
    • Visible wear and tear in high-traffic areas
    • Stains that have changed the carpet’s texture
    • Allergies or respiratory issues that worsen around the carpet

    Remember, while a well-maintained carpet can last 10-15 years, sometimes replacement is the best solution for a fresh, clean look in your home.

    Conclusion

    Removing carpet stains can be challenging, but with the right techniques and a bit of persistence, you can often restore your carpet to its original condition. Remember to act quickly, identify the stain type, and use appropriate cleaning methods. Don’t be afraid to try DIY solutions, but also know when it’s time to call in the professionals. With regular care and prompt attention to spills, you can keep your carpets looking beautiful for years to come.

    By following this comprehensive guide, you’ll be well-equipped to tackle even the toughest carpet stains. Whether you’re dealing with red wine, pet accidents, or mysterious set-in stains, you now have the knowledge to approach the problem methodically and effectively.

    Happy cleaning!

    Image by freepik

  • How to Start a Home Garden

    How to Start a Home Garden

    Creating a home garden is a fulfilling project that brings beauty, sustainability, and a touch of nature to your living space. Whether you have a large backyard or a small balcony, gardening can be a rewarding hobby. This comprehensive guide will walk you through the steps to start a home garden, from planning and selecting plants to maintaining your garden over time.

    Benefits of Home Gardening

    Home gardening offers a variety of benefits, from improving mental well-being to reducing your carbon footprint. Here are some reasons to consider starting a home garden:

    Stress Relief: Gardening is known to reduce stress and promote relaxation. Spending time outdoors, tending to plants, and watching them grow can be therapeutic.

    Fresh Produce: Growing your own vegetables and herbs gives you access to fresh, organic produce. It’s a satisfying way to incorporate more nutritious food into your diet.

    Environmental Impact: Home gardening helps reduce your carbon footprint. It allows you to grow food locally, reducing the need for transportation and packaging.

    Creative Expression: Gardening is an art form that lets you design and shape your outdoor space. You can choose colors, layouts, and plants that reflect your personal style.

    Planning Your Home Garden

    Before you start planting, take some time to plan your home garden. Proper planning ensures you have a garden that suits your space, climate, and preferences. Here’s what you should consider:

    Assess Your Space: Determine how much space you have for your garden. This includes your backyard, front yard, balcony, or windowsill. Measure the available space to understand your garden’s potential layout.

    Choose a Garden Type: There are several types of home gardens to choose from. You can opt for a vegetable garden, a flower garden, a herb garden, or a combination of these. Decide what type of garden suits your needs and interests.

    Sunlight and Shade: Observe how much sunlight your garden space receives throughout the day. This information is crucial for selecting the right plants. Most vegetables and flowers require at least six hours of direct sunlight per day.

    Climate and Soil Conditions: Consider your local climate and the type of soil in your garden area. Some plants thrive in certain climates, while others require specific soil conditions. Knowing these factors will help you choose the right plants for your garden.

    Design Your Garden Layout: Sketch a basic layout of your garden, considering where different plants will go. Take into account paths, raised beds, and areas for seating or garden decorations. Planning your garden layout ensures you make the best use of your space.

    Choosing the Right Plants

    Selecting the right plants for your home garden is a critical step in ensuring its success. Consider your climate, available space, and personal preferences when choosing plants. Here’s how to approach plant selection:

    Start with Easy-to-Grow Plants: If you’re new to gardening, begin with plants that are known for their ease of growth and maintenance. Popular choices for beginners include tomatoes, lettuce, basil, and marigolds.

    Grow Vegetables and Herbs: Homegrown vegetables and herbs are practical and rewarding. Consider growing tomatoes, peppers, lettuce, cucumbers, and herbs like basil, parsley, and cilantro. These plants are relatively easy to grow and provide fresh produce for your kitchen.

    Include Flowers for Color: Flowers add beauty and color to your garden. Consider planting annuals like petunias and marigolds or perennials like daylilies and lavender. Flowers can also attract pollinators like bees and butterflies, contributing to a healthy garden ecosystem.

    Consider Native Plants: Native plants are well-adapted to your local climate and soil conditions. They require less maintenance and provide habitat for local wildlife. Research native plants in your area and incorporate them into your garden.

    Think About Companion Planting: Companion planting is the practice of growing different plants together to benefit each other. For example, planting marigolds among vegetables can help deter pests. Learn about companion planting to create a harmonious garden environment.

    Essential Tools and Supplies for Gardening

    Having the right tools and supplies is crucial for successful gardening. Here’s a list of essential gardening tools and supplies to get you started:

    Gardening Gloves: Protect your hands from dirt, thorns, and rough surfaces. Choose gloves that are durable and comfortable to wear.

    Shovel and Spade: These are essential for digging holes, turning soil, and planting. A shovel is useful for larger tasks, while a spade is ideal for more precise work.

    Hand Trowel: A hand trowel is a small gardening tool for digging and transplanting. It’s perfect for working in smaller garden spaces.

    Rake: A rake is useful for leveling soil, clearing debris, and spreading mulch. Choose a sturdy rake for efficient gardening.

    Watering Can or Hose: Watering is essential for garden health. A watering can is suitable for smaller gardens, while a hose is ideal for larger spaces. Consider a nozzle with adjustable spray patterns for versatility.

    Pruning Shears: Pruning shears are used to trim and shape plants, remove dead branches, and harvest vegetables. Look for high-quality shears that are sharp and easy to use.

    Compost Bin: Composting is an excellent way to recycle organic waste and create nutrient-rich soil for your garden. Consider a compost bin or pile to start composting at home.

    Planting and Maintaining Your Garden

    With your garden planned and your tools ready, it’s time to start planting and maintaining your garden. Here’s a step-by-step approach to planting and caring for your home garden:

    Prepare the Soil: Before planting, ensure your soil is well-prepared. Remove weeds, debris, and rocks from the garden area. Add compost or organic matter to improve soil fertility and drainage.

    Planting: Follow the recommended planting times and depths for each type of plant. Leave enough space between plants to allow for growth. Plant taller plants at the back or center of the garden, with shorter plants around the edges.

    Watering: Water your garden regularly, especially during dry periods. The amount of water required depends on the plants and your local climate. Avoid overwatering, which can lead to root rot.

    Mulching: Mulching helps retain moisture, suppress weeds, and regulate soil temperature. Use organic mulch like wood chips or straw to cover the soil around your plants.

    Pruning and Weeding: Regularly prune your plants to encourage growth and maintain their shape. Remove weeds to prevent competition for nutrients and water.

    Fertilizing: Depending on your soil’s nutrient content, you may need to fertilize your garden. Use organic or slow-release fertilizers to avoid over-fertilization. Follow the recommended application guidelines.

    Pest Control: Monitor your garden for pests and diseases. Use natural or organic pest control methods when possible, such as neem oil or companion planting. Avoid harsh chemicals that can harm beneficial insects and the environment.

    Resources and Communities for DIY Gardeners

    As you embark on your gardening journey, connecting with resources and communities can provide valuable support and inspiration. Here are some recommended resources for DIY gardeners:

    Gardening Websites: Websites like Gardening Know How and Gardener’s Supply Company offer tips, articles, and gardening advice. Explore these websites for guidance on various gardening topics.

    Gardening Books: Books can be a great source of in-depth information on gardening. Consider books like “The Vegetable Gardener’s Bible” by Edward C. Smith or “Square Foot Gardening” by Mel Bartholomew for practical gardening advice.

    Gardening Communities: Connect with other gardeners to share tips and experiences. Online communities like Reddit’s r/gardening and National Gardening Association are great places to ask questions and learn from experienced gardeners.

    Local Gardening Groups: Check for local gardening clubs or groups in your area. These groups often host events, workshops, and plant swaps, providing opportunities to meet other gardeners and learn from their expertise.

    With this comprehensive guide, you’re well on your way to starting and maintaining a successful home garden. Remember, gardening is a journey that requires patience and care. Enjoy the process of watching your garden grow and flourish, and take pride in the results of your DIY gardening efforts.

    Image by rawpixel.com on Freepik

  • How to Start Learning to Code

    How to Start Learning to Code

    Coding has become an essential skill in the modern world, opening doors to career opportunities, personal projects, and even creative expression. If you’re interested in learning to code but don’t know where to begin, this guide will walk you through the basics, offer practical tips, and point you toward valuable resources to kick-start your journey into programming.

    Why Learn to Code?

    Coding is a valuable skill with applications in various industries and aspects of daily life. Here are some reasons why learning to code is worthwhile:

    Career Opportunities: Coding skills are highly sought after in the job market. From software development and data analysis to automation and AI, coding opens a wide range of career paths. You can work in technology, finance, healthcare, or even the creative arts, depending on your interests.

    Problem-Solving Skills: Coding involves logic and problem-solving. Learning to code helps you develop critical thinking skills and approach challenges with a structured mindset. This skill can be beneficial in many areas of life, not just programming.

    Creativity and Expression: Coding allows you to create something from scratch. Whether it’s a website, a mobile app, or an interactive game, coding provides a creative outlet to build and share your ideas with the world.

    Automation and Efficiency: Knowing how to code can help you automate repetitive tasks, streamline processes, and increase efficiency. This can be useful in both personal and professional settings.

    Choosing a Programming Language

    Choosing the right programming language is a crucial step in learning to code. It depends on your goals, interests, and the type of projects you want to work on. Here are some popular programming languages and their typical applications:

    Python: Known for its simplicity and versatility, Python is an excellent choice for beginners. It’s widely used in data science, machine learning, web development, automation, and more. The readability of Python’s syntax makes it easy to learn, and there’s a large community for support.

    JavaScript: If you’re interested in web development, JavaScript is indispensable. It’s the backbone of interactive websites and front-end development. JavaScript also has frameworks like React and Angular, which are popular for building complex web applications.

    Java: Java is a versatile language used in enterprise applications, Android app development, and large-scale systems. It has a robust ecosystem and a long history, making it a valuable skill in many industries.

    Ruby: Ruby is known for its simplicity and productivity. It’s often used in web development with frameworks like Ruby on Rails. Ruby has a friendly community and an easy-to-read syntax, making it ideal for beginners.

    C++: If you’re interested in game development, system programming, or software that requires high performance, C++ is a great choice. However, it has a steeper learning curve compared to other languages.

    Finding the Right Learning Resources

    Once you’ve chosen a programming language, it’s time to find the right resources to learn. Here are some reputable platforms and sources to help you get started with coding:

    Online Courses: Online platforms offer structured courses for beginners to advanced learners. Consider these popular platforms for comprehensive coding courses:

    Coursera: Offers courses from leading universities and organizations. It has a wide range of programming-related topics, from Python basics to advanced AI.

    Udemy: Provides a vast selection of coding courses at affordable prices. You can learn everything from basic programming to web development and data science.

    edX: Offers free and paid courses from top universities. edX covers various programming languages and specializations.

    Interactive Coding Platforms: These platforms offer hands-on coding exercises and projects to help you practice while you learn:

    Codecademy: A beginner-friendly platform with interactive coding exercises in Python, JavaScript, Ruby, and other languages.

    freeCodeCamp: Provides a structured curriculum with real-world projects. It’s a non-profit platform that offers free coding lessons and projects.

    Kaggle: Ideal for those interested in data science and machine learning. Kaggle offers coding exercises and competitions for hands-on learning.

    Coding Bootcamps: If you’re looking for an intensive, immersive learning experience, coding bootcamps provide comprehensive training in a short period. Consider these well-known bootcamps:

    General Assembly: Offers bootcamps in software engineering, data science, and other technology-related fields.

    Flatiron School: Known for its coding bootcamps in software engineering, data science, and cybersecurity.

    Le Wagon: Provides bootcamps focused on web development and data science, with locations worldwide.

    Books: Books are excellent resources for detailed explanations and comprehensive coverage of programming concepts. Some popular books for beginners include:

    Python Crash Course by Eric Matthes: A comprehensive guide to learning Python, ideal for beginners.

    Eloquent JavaScript by Marijn Haverbeke: A popular book for learning JavaScript, with examples and projects.

    Learn You a Haskell for Great Good! by Miran Lipovača: A fun and engaging guide to learning Haskell, a functional programming language.

    Practical Tips for Learning to Code

    Learning to code requires patience, practice, and persistence. Here are some practical tips to help you stay on track and make steady progress:

    Start with the Basics: Focus on foundational concepts like variables, data types, loops, and functions. Build a strong understanding of these basics before moving on to more complex topics.

    Practice Regularly: Consistency is key to learning to code. Aim to code regularly, even if it’s just for a short time each day. The more you practice, the more you’ll reinforce your skills.

    Build Projects: Apply your knowledge by building small projects. Start with simple projects like a personal website or a basic game, and gradually work your way up to more complex ones.

    Join a Coding Community: Engaging with other learners and experienced programmers can provide valuable support and motivation. Platforms like GitHub, Stack Overflow, and Reddit’s r/learnprogramming offer coding communities where you can ask questions, share projects, and get feedback.

    Use Coding Challenges: Participate in coding challenges to test your skills and improve your problem-solving abilities. Websites like LeetCode, HackerRank, and Codewars provide a variety of coding challenges at different difficulty levels.

    Embrace Mistakes: Making mistakes is a natural part of learning to code. Don’t be afraid to experiment, debug, and learn from errors. Use debugging tools and practice problem-solving to overcome obstacles.

    Setting Goals and Measuring Progress

    Setting goals and tracking your progress can keep you motivated and focused on your learning journey. Here are some effective ways to set goals and measure progress:

    Set SMART Goals: SMART stands for Specific, Measurable, Achievable, Relevant, and Time-bound. For example, a SMART goal might be, “Complete a basic Python course in two weeks” or “Build a personal website in one month.”

    Break Down Projects into Tasks: If you have a larger project in mind, break it down into smaller tasks. This makes it easier to manage and helps you see your progress as you complete each step.

    Track Your Learning Journey: Keep a coding journal or use a project management tool to track your learning journey. Document what you’ve learned, challenges you’ve faced, and milestones you’ve achieved.

    Celebrate Your Achievements: Acknowledge your accomplishments along the way, whether it’s completing a course, solving a complex problem, or building your first project. Celebrating small wins can boost your morale and keep you motivated to continue learning.

    By following this comprehensive guide, you’ll have a clear roadmap to start learning to code and build a strong foundation in programming. Remember, coding is a journey that requires persistence and patience. With consistent practice and a willingness to learn, you’ll be well on your way to becoming a confident programmer.

    Image by freepik

  • How to Protect Your Online Accounts

    How to Protect Your Online Accounts

    Cybersecurity is a critical concern in the digital age. With the growing number of online accounts and the increasing sophistication of cyber threats, safeguarding your digital identity is more important than ever. Hackers, cybercriminals, and fraudsters are constantly finding new ways to gain unauthorized access to personal information, commit identity theft, and cause financial harm. This comprehensive guide provides an in-depth look at the steps you can take to secure your online accounts and protect your personal information.

    Understanding the Importance of Online Security

    In today’s interconnected world, we rely heavily on digital platforms for various aspects of our lives, from online banking and shopping to communication and entertainment. As a result, these platforms hold a wealth of sensitive information, including personal data, financial details, and confidential communications. Cybercriminals target these online accounts to steal information, access financial resources, or use them for malicious purposes. Understanding the risks and knowing how to mitigate them is the first step in ensuring your online safety.

    The Consequences of a Security Breach

    The impact of a security breach can be far-reaching, affecting both individuals and organizations. Here are some common consequences of a security breach:

    Identity Theft: Stolen personal information can be used to impersonate you, opening new accounts, making unauthorized purchases, or committing other forms of fraud.

    Financial Loss: Unauthorized transactions on your accounts can lead to significant financial loss. Even if banks or credit card companies reimburse the lost funds, the disruption to your finances can be stressful.

    Data Loss: Hackers can delete or encrypt important data, such as photos, documents, or other sensitive information, which can be devastating, especially without proper backups.

    Reputational Damage: If your online accounts are compromised, it can harm your personal or professional reputation. Unauthorized posts or messages from your accounts can affect your relationships and career prospects.

    Given these potential consequences, let’s explore the common cyber threats that can compromise your online security and the specific steps you can take to protect yourself.

    Common Cyber Threats and Attacks

    Cybercriminals use various techniques to gain unauthorized access to online accounts and personal information. Understanding these common cyber threats can help you recognize and defend against them. Here’s a detailed look at some of the most prevalent types of cyber threats:
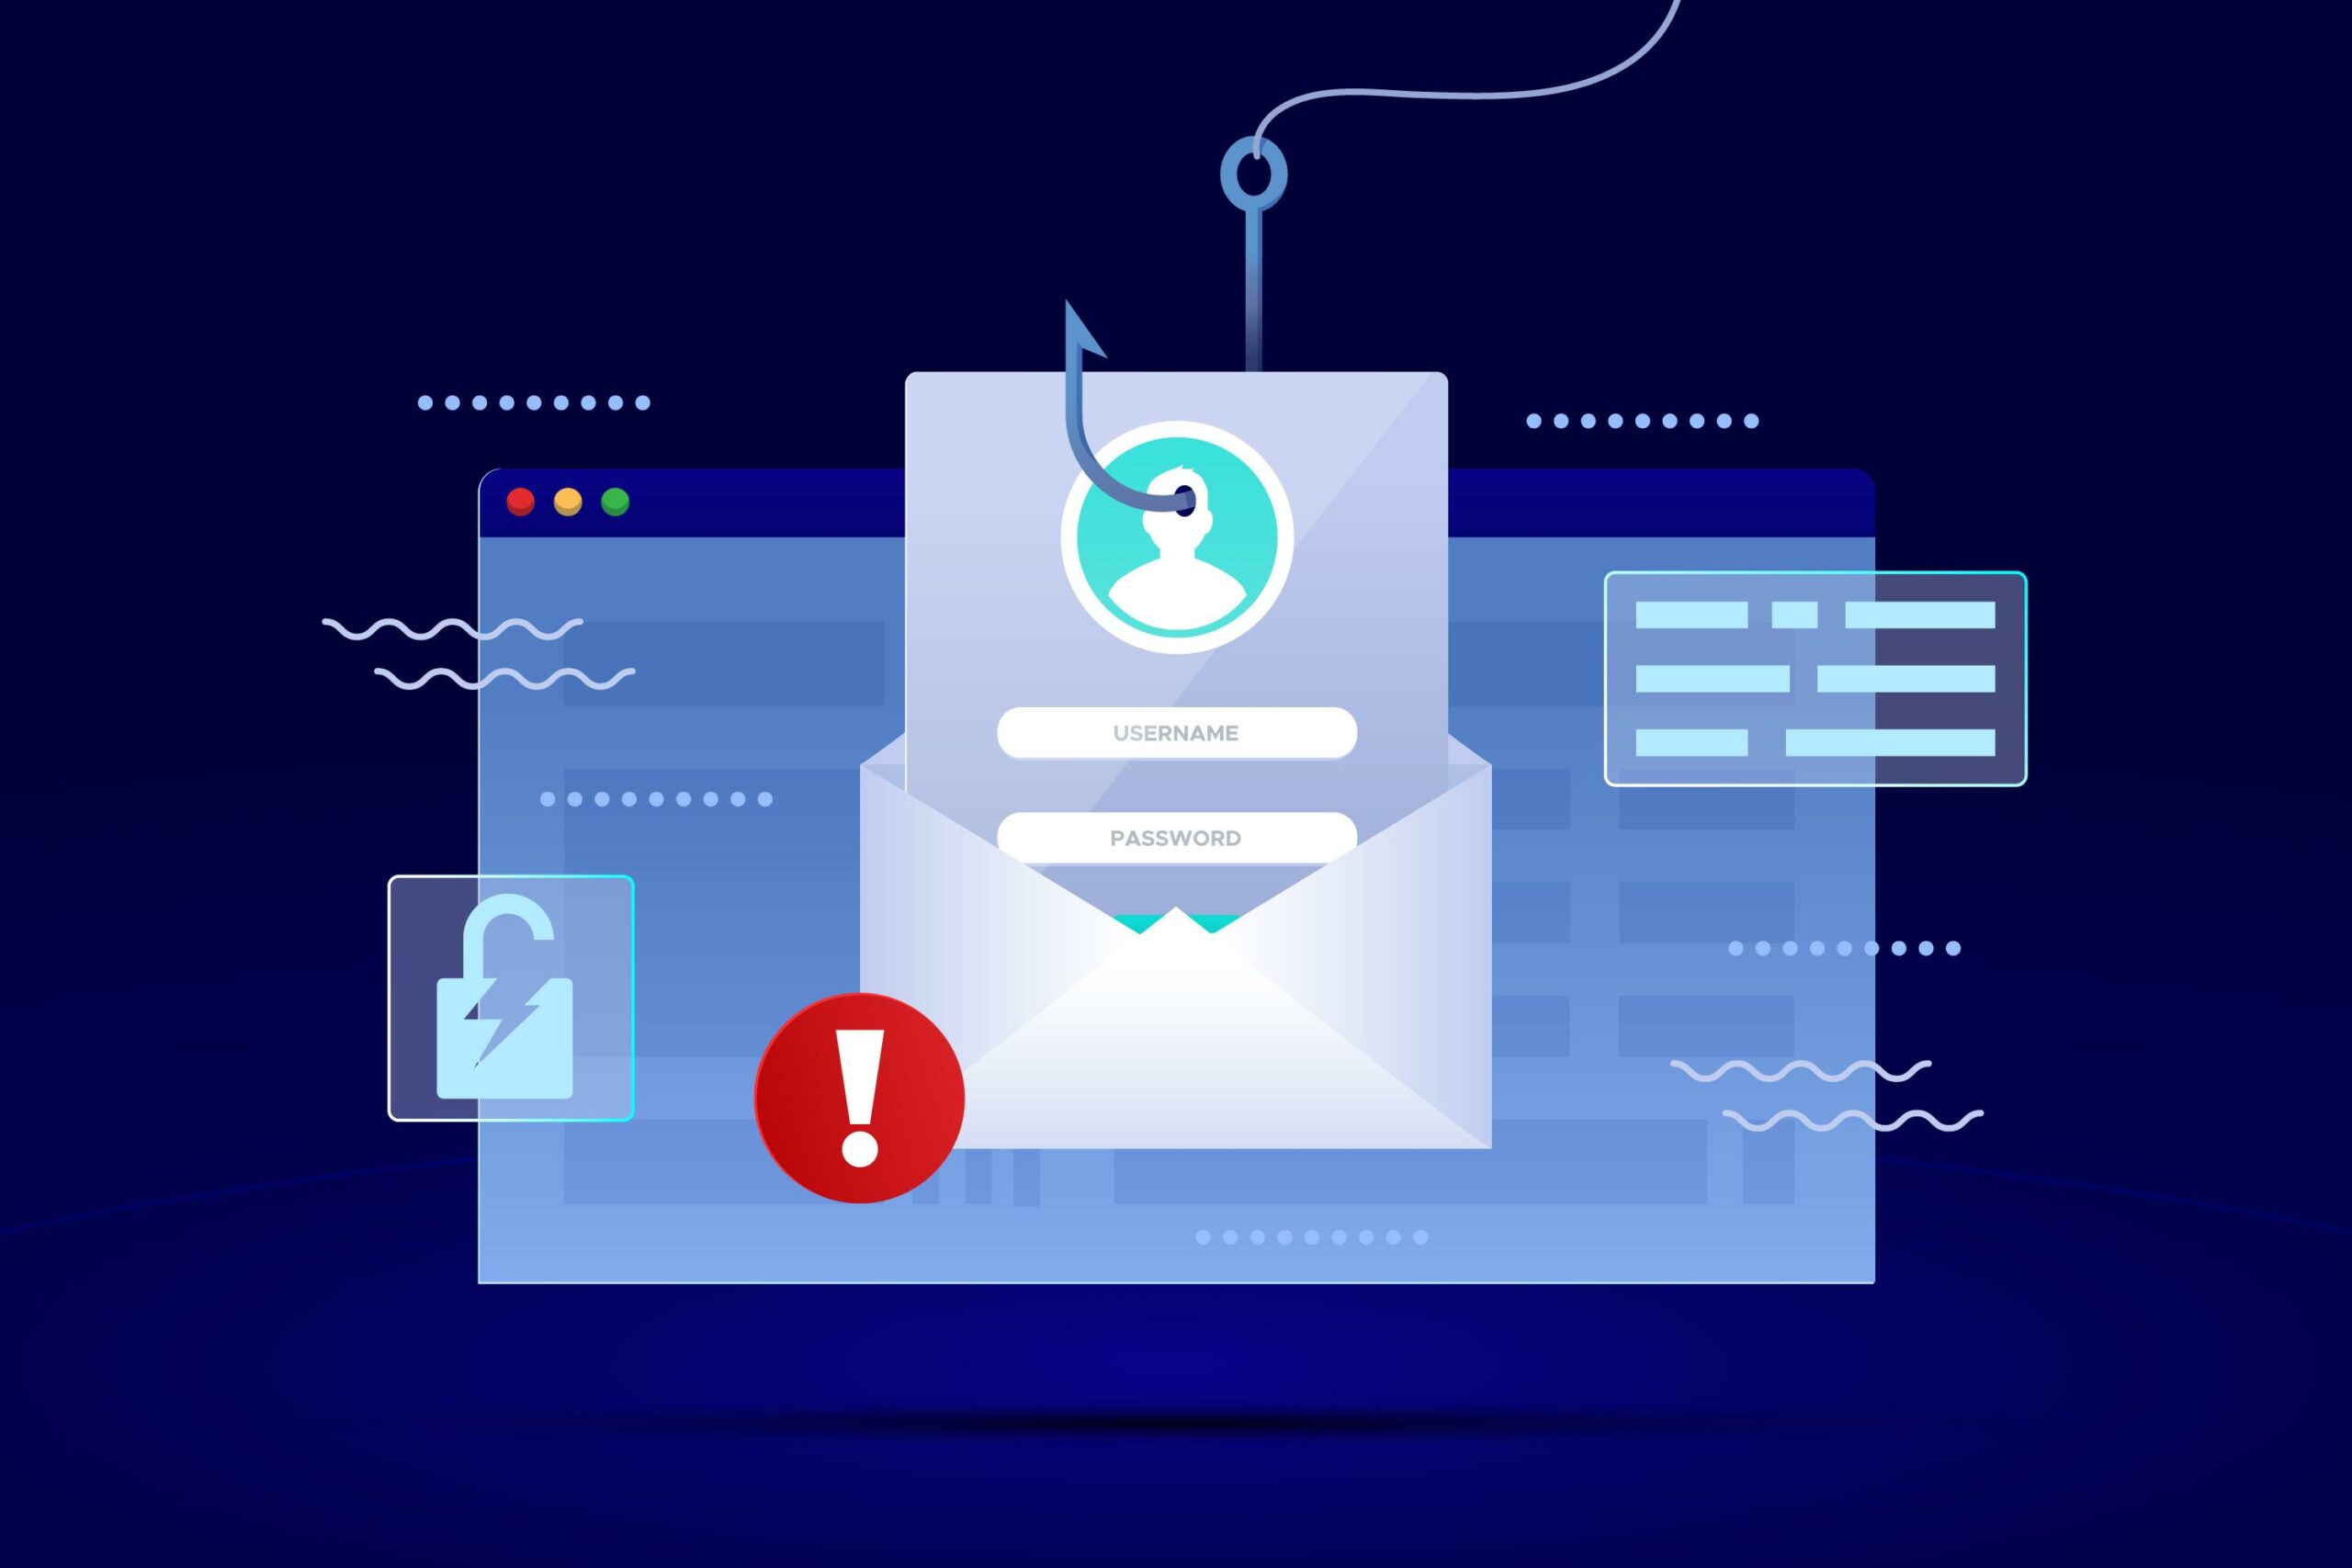
    Phishing: Phishing attacks involve deceptive emails or messages designed to trick you into providing sensitive information, such as passwords, credit card numbers, or personal details. Phishing emails often appear to come from legitimate sources, like banks, government agencies, or well-known companies. To avoid phishing, look for red flags like poor grammar, unexpected requests for information, or suspicious links.

    Malware: Malware refers to malicious software designed to infect your computer or device, allowing hackers to steal data or gain unauthorized access. Common types of malware include viruses, worms, trojans, ransomware, spyware, and adware. Malware can be spread through email attachments, infected websites, or compromised software downloads.

    Social Engineering: Social engineering attacks rely on manipulating people into revealing sensitive information or performing actions that benefit the attacker. This can occur through phone calls, emails, or even in-person interactions. Cybercriminals may pose as tech support, government officials, or other trusted figures to gain your trust.

    Credential Stuffing: Credential stuffing involves automated tools that test large numbers of username-password combinations to gain unauthorized access to online accounts. This technique relies on data breaches that expose login credentials, allowing attackers to try them on various websites and services.

    Man-in-the-Middle Attacks: In these attacks, a hacker intercepts communications between two parties, allowing them to eavesdrop, modify the content, or insert malicious code. These attacks often occur on unsecured networks, such as public Wi-Fi.

    Step-by-Step Guide to Protecting Your Online Accounts

    Securing your online accounts requires a combination of best practices, security tools, and vigilance. This step-by-step guide outlines the key actions you should take to protect your digital identity and minimize the risk of cyber threats.

    Step 1: Use Strong and Unique Passwords

    Passwords are the first line of defense against unauthorized access to your online accounts. Creating strong and unique passwords is essential for maintaining security. Here are some detailed tips for creating and managing strong passwords:

    Creating Strong Passwords: Aim for passwords that are at least 12 characters long, with a mix of uppercase and lowercase letters, numbers, and special characters. Avoid using easily guessable words or common phrases. A strong password is difficult for attackers to crack, even with automated tools.

    Using Unique Passwords for Each Account: Never use the same password for multiple accounts. If one account is compromised, attackers can use the same password to gain access to other accounts. This practice is known as “password reuse,” and it significantly increases your risk of a security breach.

    Using a Password Manager: A password manager can help you generate and store strong passwords securely. These tools allow you to use complex passwords without the need to remember them. Popular password managers include LastPass, 1Password, and Dashlane. They can also autofill your login credentials, reducing the risk of keylogging.

    Regularly Updating Passwords: Change your passwords periodically, especially after a security breach or if you suspect your account has been compromised. It’s a good practice to update passwords every few months or when prompted by security incidents.

    Step 2: Enable Two-Factor Authentication (2FA)

    Two-factor authentication (2FA) provides an additional layer of security by requiring a second form of verification in addition to your password. This step is critical in preventing unauthorized access, even if a hacker gains access to your password. Here’s a deeper look into 2FA:

    Types of 2FA: There are various forms of two-factor authentication, including receiving a verification code via SMS, email, or an authentication app; using biometric authentication like fingerprint or facial recognition; or employing a hardware security key. Choose the 2FA method that best suits your security needs and convenience.

    Benefits of 2FA: 2FA provides a significant security advantage because it adds a secondary barrier to account access. Even if hackers obtain your password, they would still need the second form of verification to gain access, making it much more difficult for unauthorized access.

    How to Enable 2FA: To enable 2FA, navigate to the security settings of your online accounts. Look for the option to enable two-factor authentication or multi-factor authentication. Follow the instructions to set up your preferred method of 2FA. Many platforms offer multiple options, allowing you to choose the one that best fits your needs.

    Step 3: Be Vigilant About Phishing and Social Engineering

    Phishing and social engineering attacks rely on human error and manipulation. By being vigilant and recognizing the signs of these attacks, you can significantly reduce your risk of falling victim to them. Here’s how to stay alert and avoid these threats:

    Identifying Phishing Attempts: Phishing emails often contain telltale signs, such as poor grammar, unexpected requests for sensitive information, or suspicious links. Avoid clicking on links in emails or messages from unknown sources, and be cautious when opening attachments. If an email seems suspicious, verify its legitimacy before taking action.

    Verifying the Source: If you receive an email or message requesting sensitive information, verify the source before responding. Contact the organization directly using a known phone number or email address. Avoid using contact information provided in the message, as it could lead you to a phishing site.

    Not Sharing Personal Information: Be cautious about sharing personal information over email or messages, especially if you did not initiate the communication. Cybercriminals may use social engineering tactics to gather personal details and build a profile for future attacks.

    Educating Yourself and Others: Stay informed about common phishing and social engineering tactics. Educate your family, friends, and coworkers about these threats to help them stay safe online. Consider attending cybersecurity workshops or taking online courses to enhance your knowledge of online security.

    Step 4: Keep Your Software Updated and Secure

    Software vulnerabilities are common entry points for cyber threats. Keeping your software and devices up to date is essential to maintain security. Here’s a comprehensive approach to ensure your software and devices are secure:

    Regular Software Updates: Install software updates and patches as soon as they become available. Updates often include security fixes that address vulnerabilities discovered in the software. Keep your operating system, applications, and security software up to date.

    Using Security Software: Install reputable antivirus and anti-malware software on your devices. This software provides real-time protection against malware and other cyber threats. Popular security software includes Norton, McAfee, Kaspersky, and Bitdefender.

    Securing Your Devices: Use strong passwords or biometric authentication to secure your devices. This includes smartphones, tablets, laptops, and other devices that access your online accounts. Consider enabling encryption on your devices to add an extra layer of protection.

    Being Cautious with Downloads: Only download software and applications from trusted sources. Avoid downloading files or installing software from unverified or suspicious websites. Malware is often distributed through rogue downloads, so always exercise caution.

    Step 5: Monitor Your Accounts for Unusual Activity

    Monitoring your online accounts for unusual activity is a crucial step in detecting and preventing unauthorized access. By being vigilant, you can quickly respond to potential security breaches and minimize the impact. Here’s how to effectively monitor your accounts:

    Checking Account Activity Regularly: Regularly review the activity on your online accounts, including login attempts, transactions, and profile changes. If you notice any suspicious activity, report it immediately to the service provider or platform’s customer support.

    Setting Up Account Alerts: Many online accounts offer the option to set up alerts for specific activities, such as login attempts, password changes, or transactions. Enable these alerts to receive real-time notifications of unusual activity. Alerts help you respond quickly to potential security breaches.

    Reporting Suspicious Activity: If you suspect that your account has been compromised, contact the relevant service provider or platform’s customer support immediately. Follow their instructions to secure your account and prevent further unauthorized access. In some cases, you may need to reset your password or provide additional verification to regain control of your account.

    Step 6: Protect Your Personal Information and Privacy

    Protecting your personal information and maintaining your privacy are key aspects of online security. Being cautious about what you share online and using privacy-focused tools can help safeguard your digital identity. Here’s a detailed approach to protecting your personal information and privacy:

    Limiting Personal Information Online: Avoid sharing sensitive personal information on social media or other public platforms. Be mindful of what you post, and use privacy settings to control who can view your posts and profile information. Cybercriminals often use social media to gather information for social engineering attacks.

    Using Virtual Private Networks (VPNs): A VPN encrypts your internet connection, providing an additional layer of privacy and security when using public Wi-Fi or accessing the internet from untrusted locations. VPNs help protect your data from man-in-the-middle attacks and other eavesdropping risks. Popular VPN services include NordVPN, ExpressVPN, and CyberGhost.

    Securing Your Personal Devices: Protect your personal devices with strong passwords, biometric authentication, or other security measures. Enable remote tracking and wiping features in case your device is lost or stolen. These features allow you to locate your device or erase its data to prevent unauthorized access.

    Being Cautious with Social Media: Cybercriminals often use social media to gather information for social engineering attacks. Be cautious about accepting friend requests from unknown individuals or clicking on suspicious links. Avoid oversharing personal information, such as your address, phone number, or sensitive details about your life.

    By following these comprehensive steps, you can significantly reduce the risk of cyber threats and protect your online accounts from unauthorized access. Staying vigilant, staying informed, and taking proactive measures are the keys to maintaining a secure and worry-free online experience. Embrace these best practices to keep your digital identity safe and your online accounts secure.
    Image by freepik

  • How to Build a Fire Pit to Transform Your Patio into a Backyard Oasis

    How to Build a Fire Pit to Transform Your Patio into a Backyard Oasis

    Imagine spending cozy evenings under the stars with the gentle crackle of a fire filling the air, a gentle breeze rustling the leaves, and a warm fire pit at the center of your patio. A fire pit can transform your backyard into an inviting oasis, a place where family and friends gather to share stories and create memories. Building a fire pit from scratch not only gives you a sense of accomplishment, but it also allows for unique customization, creating a focal point that reflects your style. This comprehensive guide will walk you through every step of planning, constructing, and enjoying your fire pit.

    Before You Begin: Planning and Preparation

    Location, Location, Location

    Selecting the right location for your fire pit is crucial. Safety, accessibility, and aesthetics are key factors to consider. Here’s a detailed breakdown:

    Safety First: Start by assessing your backyard for any potential hazards. Keep the fire pit at least 6 feet away from your house, fences, trees, or other flammable materials. Check your local fire codes, as some may require a greater distance. Avoid placing the fire pit under low-hanging branches or near power lines. You should also choose a spot with good drainage to avoid pooling water.

    Accessibility and Comfort: Think about how you’ll use your fire pit. Is there enough room for seating around it? Consider the space required for people to move around comfortably without being too close to the fire. Ensure there’s a clear path for guests to approach the fire pit without tripping or stepping into the fire area.

    Focal Point: Determine how the fire pit will integrate with the rest of your patio. Would it work best as a central gathering point, or as a more private area off to the side? Consider how it can complement other outdoor features like a gazebo, garden, or pool. Positioning the fire pit in a spot where it can be viewed from inside the house is another excellent way to create a visually appealing focal point.

    Permits and Regulations: Before breaking ground, check local building codes and regulations. Some jurisdictions require a permit to construct a fire pit, while others might have restrictions on its size or the type of fuel you can use. Don’t skip this step; it’s better to be safe and compliant with local laws. Contact your local fire department or municipal office for specific information.

    Design and Materials

    With the location sorted, it’s time to decide on the design and materials for your fire pit. The design you choose will depend on your skill level, budget, and desired aesthetic. Here are some popular options and their advantages:

    Firebrick: A traditional choice known for its high heat resistance and durability. It requires masonry skills, but the result is a robust, long-lasting fire pit. Firebricks can be used to create intricate designs, and they can be easily customized to fit your preferred shape and size.

    Cast Iron Rings: This option is portable and easy to install. Cast iron provides excellent heat retention and is ideal for those who want a simpler setup. You can find cast iron rings in various sizes, and they can be combined with other materials like stone or pavers to create a custom look.

    Pre-cast Concrete Rings: These are a cost-effective choice, especially for those with limited masonry experience. While they are relatively easy to assemble, they might crack over time due to high heat. To mitigate this, ensure you’re using high-quality concrete rings specifically designed for fire pits.

    Stone or Pavers: If you’re looking for a natural, rustic appearance, stone or pavers are a great choice. They require a sturdy base and careful construction to ensure stability. Stones offer a wide range of textures and colors, allowing you to create a truly unique fire pit. When using stones, ensure they are heat-resistant and suitable for fire pit construction.

    Building Your Fire Pit: Step-by-Step Guide

    After you’ve finalized your design, obtained any necessary permits, and gathered your materials, it’s time to start building. The following step-by-step guide assumes a fire pit using fire bricks. You can adjust based on your chosen design and materials.

    Excavation

    Begin by marking the desired size and shape of your fire pit on the ground. A common size for a fire pit is a circle with a diameter of about 3-4 feet, but you can customize this based on your needs. Use stakes and string to outline the perimeter. Next, dig a pit to a depth of 12-18 inches. Ensure the base is level and free of debris or rocks that could cause instability.

    Laying the Base

    To create a stable foundation, add a 2-3 inch layer of crushed gravel or sand at the bottom of the pit. This base material helps with drainage and provides a solid surface for your fire pit walls. Use a tamper or a heavy object to compact the base material, ensuring it is even and stable.

    Building the Fire Pit Wall

    Now it’s time to build the fire pit wall. Lay your first course of fire bricks around the perimeter of the pit. Use firebrick mortar to secure the bricks together. Be sure to stagger the bricks for added stability and strength. As you add more courses, use a level to ensure each layer is straight and even. Typically, 2-4 layers are enough, but this can vary depending on your design.

    Airflow Channels

    Proper airflow is crucial for a well-functioning fire pit. Leave a few small gaps between the bottom layer of bricks to allow air to flow into the fire. This will help the fire burn more efficiently and keep it from going out unexpectedly. These gaps can be evenly spaced around the fire pit to ensure even airflow.

    Optional Features

    To enhance your fire pit’s functionality and appearance, consider adding a fire pit ring or grate on top of the firebrick wall. This can help elevate the burning platform and make it easier to remove ash and debris. You might also want to add a decorative cap or edging around the top of the fire pit for a more finished look. If you plan to use the fire pit for cooking, consider adding a grill grate or a rotisserie attachment.

    Curing Time

    After building your fire pit, allow the firebrick mortar to cure completely before lighting your first fire. Curing times can vary depending on the mortar and weather conditions, but typically, it takes 24-48 hours. Follow the manufacturer’s instructions for curing to ensure your fire pit is safe and durable.

    Safety Tips and Enjoying Your Fire Pit

    Fire safety is critical when using a fire pit. Here are some essential tips to keep in mind for a safe and enjoyable experience:

    Never leave a burning fire unattended. Always have someone watching the fire, and be prepared to extinguish it if necessary.

    Keep children and pets at a safe distance from the fire pit. Establish clear boundaries and use safety barriers if needed.

    Only burn seasoned firewood. Avoid using lighter fluid, gasoline, or other flammable liquids to start the fire. These substances can be extremely dangerous and lead to unpredictable fires.

    Have a fire extinguisher or a bucket of sand readily available in case of emergencies. Know where these items are located and how to use them.

    Extinguish the fire completely before leaving the fire pit unattended. Douse the embers with water, then stir to ensure no hot spots remain. This is crucial for preventing accidental fires.

    With your fire pit complete and safety measures in place, you’re ready to enjoy the warmth and ambiance it provides. Invite friends and family, toast marshmallows, and share stories around the fire. The fire pit will become a cherished addition to your outdoor space, bringing warmth, comfort, and memories that will last a lifetime.

    Image by vecstock on Freepik

  • Build a Thriving Raised Garden Bed (Even with Zero Experience!)

    Build a Thriving Raised Garden Bed (Even with Zero Experience!)

    Ever dream of having a flourishing vegetable patch or a vibrant flower haven right outside your door? Raised garden beds are the answer! They offer the perfect solution for limited space, poor soil quality, and even novice gardeners.

    So, grab your tools and a sprinkle of enthusiasm, because we’re about to embark on a journey to build your very own raised garden bed!

    Before We Dig In…

    First things first, let’s address the essentials. We’ll need to decide on the size and location of your masterpiece. Remember, this garden bed should be your haven, so prioritize comfort and accessibility when determining its dimensions.

    For materials, we’ll be using sturdy wooden planks – cedar or redwood are great choices for their natural resistance. However, pressure-treated lumber can work too, just avoid using it for vegetable gardens. Here’s a handy shopping list to keep you on track:

    • Cedar or redwood planks:
      • 4 x desired length of your bed (e.g., 8ft)
      • 4 x desired height of your bed (e.g., 12 inches)
    • Galvanized screws (3 inches)
    • Drill
    • Saw (miter saw for precision cuts, but a handsaw can work too)
    • Tape measure
    • Pencil
    • Sandpaper (optional)
    • Weed barrier (optional)
    • Landscape fabric (optional)

    Now, Let’s See What the Steps Entail!

    Planning Makes Perfect:

    • Grab your tape measure and decide on the ideal size for your raised bed. Remember, it should be big enough to accommodate your desired plants while remaining comfortable for you to tend to them. A popular size is 4ft x 8ft, but feel free to adjust this based on your needs.
    • Find a clean, flat workspace for prepping your lumber.
    • If you’re using new, untreated planks, you can give them a light sanding to remove any splinters.

    Sharpen Your Saw!

    Time to unleash your inner Michelangelo (with wood, not marble!). Using your tape measure and pencil, meticulously mark the cutting lengths on your planks.

    Precise cuts are key for a sturdy and visually pleasing frame. If you have a miter saw, this is the perfect time to put it to good use. But don’t worry, a trusty handsaw will do the trick just fine too!

    Between DIYers and pros there’s a saying, ‘measure twice, cut once!’ So be sure to double-check your measurements before making the final cuts to avoid any lumber mishaps.

    3. Building Your Base:

    Here comes the fun part – assembling the frame! Lay two of your long boards flat on the ground, spaced slightly apart (about the width of a plank).

    Now, take two of the shorter boards and position them upright at each end, ensuring their edges align perfectly with the long boards.

    To create a strong and lasting bond, pre-drill pilot holes through the short boards and into the long ones (at least an inch from the edges).

    Finally, secure the corners using your galvanized screws. Repeat this process for the remaining corners to complete the rectangular frame.

    Bonus Tip: Feeling ambitious and want a super sturdy bed, especially for a taller design? Add some horizontal supports across the long sides using additional boards. Simply attach them using the same screw and pre-drilling method at even intervals along the long sides.

  • How to make a dreamcatcher

    How to make a dreamcatcher

    Dreamcatchers are not only beautiful decorations but also symbols of protection and good dreams. Creating your own dreamcatcher can be a rewarding and creative experience. In this detailed step-by-step guide, we’ll walk you through the process of making a stunning dreamcatcher, from gathering materials to adding intricate details. Let’s get started!

    Materials You’ll Need

    Before you begin crafting your dreamcatcher, gather all the necessary materials. You’ll need:

    • A hoop or circular frame (traditionally made of willow)
    • Sinew or strong thread
    • Feathers
    • Beads
    • Scissors
    • Additional decorative elements (optional)

    Step 1: Prepare the Hoop

    Start by wrapping the hoop with your chosen sinew or thread. This will form the base of your dreamcatcher. You can choose a single color or create intricate patterns by using multiple colors. Make sure the wrapping is tight and secure.

    Step 2: Create the Web

    Now, it’s time to create the distinctive web-like pattern in the center of your dreamcatcher. Starting from the center of the hoop, make a knot with your sinew or thread. Loop it around the hoop to create a small circle. Pass the thread through this circle to create a knot. Continue this process, gradually moving outward, until you’ve formed the desired web pattern. Be patient and ensure that your knots are evenly spaced.

    This web represents the spider’s web, a key element in traditional dreamcatcher symbolism. The web is believed to capture negative dreams while allowing positive ones to pass through.

    Step 3: Attach Feathers and Beads

    Once your dreamcatcher’s web is complete, it’s time to add feathers and beads. Attach feathers to the bottom, using sinew or thread. You can choose different lengths and colors for a unique look. Thread beads onto the feathers or add them separately to the sinew. Be creative with your design, and make sure everything is securely attached.

    Step 4: Incorporate Decorative Elements

    Now is your chance to add extra decorative elements to personalize your dreamcatcher further. Consider incorporating decorative charms, crystals, gemstones, or even small trinkets that hold personal significance. These additions can make your dreamcatcher truly unique.

    Step 5: Final Touches

    Inspect your dreamcatcher for any loose ends or threads, and trim them neatly. Ensure that all feathers, beads, and decorative elements are securely attached. Your dreamcatcher should be both beautiful and sturdy.

    Step 6: Hang and Enjoy

    Your dreamcatcher is now complete! Find a special place to hang it, ideally above your bed or in a location where it can catch the morning light. Traditional beliefs suggest that dreamcatchers will trap negative dreams and allow only positive ones to filter through as you sleep. Enjoy the beauty and symbolism of your handcrafted dreamcatcher.

    In conclusion, crafting a dreamcatcher is a creative and meaningful activity that allows you to express your artistic side while creating a beautiful piece of decor. Whether you’re making one for yourself or as a gift, following these steps will help you create a stunning dreamcatcher that adds a touch of mysticism and beauty to any space. So, gather your materials and embark on the journey of crafting your very own dreamcatcher!

    If you found this step-by-step guide helpful, explore more DIY crafting projects and creative activities to enhance your skills and bring more artistry into your life.

    Photo by Andreas Wagner on Unsplash