Blog

  • How to Create a Stunning Succulent Garden

    How to Create a Stunning Succulent Garden

    Welcome to the world of succulent gardening, where beauty meets simplicity. Learning how to create a stunning succulent garden is an art form that allows you to express your creativity while enjoying low-maintenance gardening. Succulents, with their captivating shapes and vibrant colors, have taken the gardening world by storm. They are perfect for both beginners and experienced gardeners, offering endless possibilities for design and care.

    In this comprehensive guide, we’ll take you through the step-by-step process of creating a breathtaking succulent garden. Whether you’re starting from scratch or looking to enhance your existing garden, our insights will empower you to craft an outdoor oasis that’s not only visually striking but also easy to maintain.

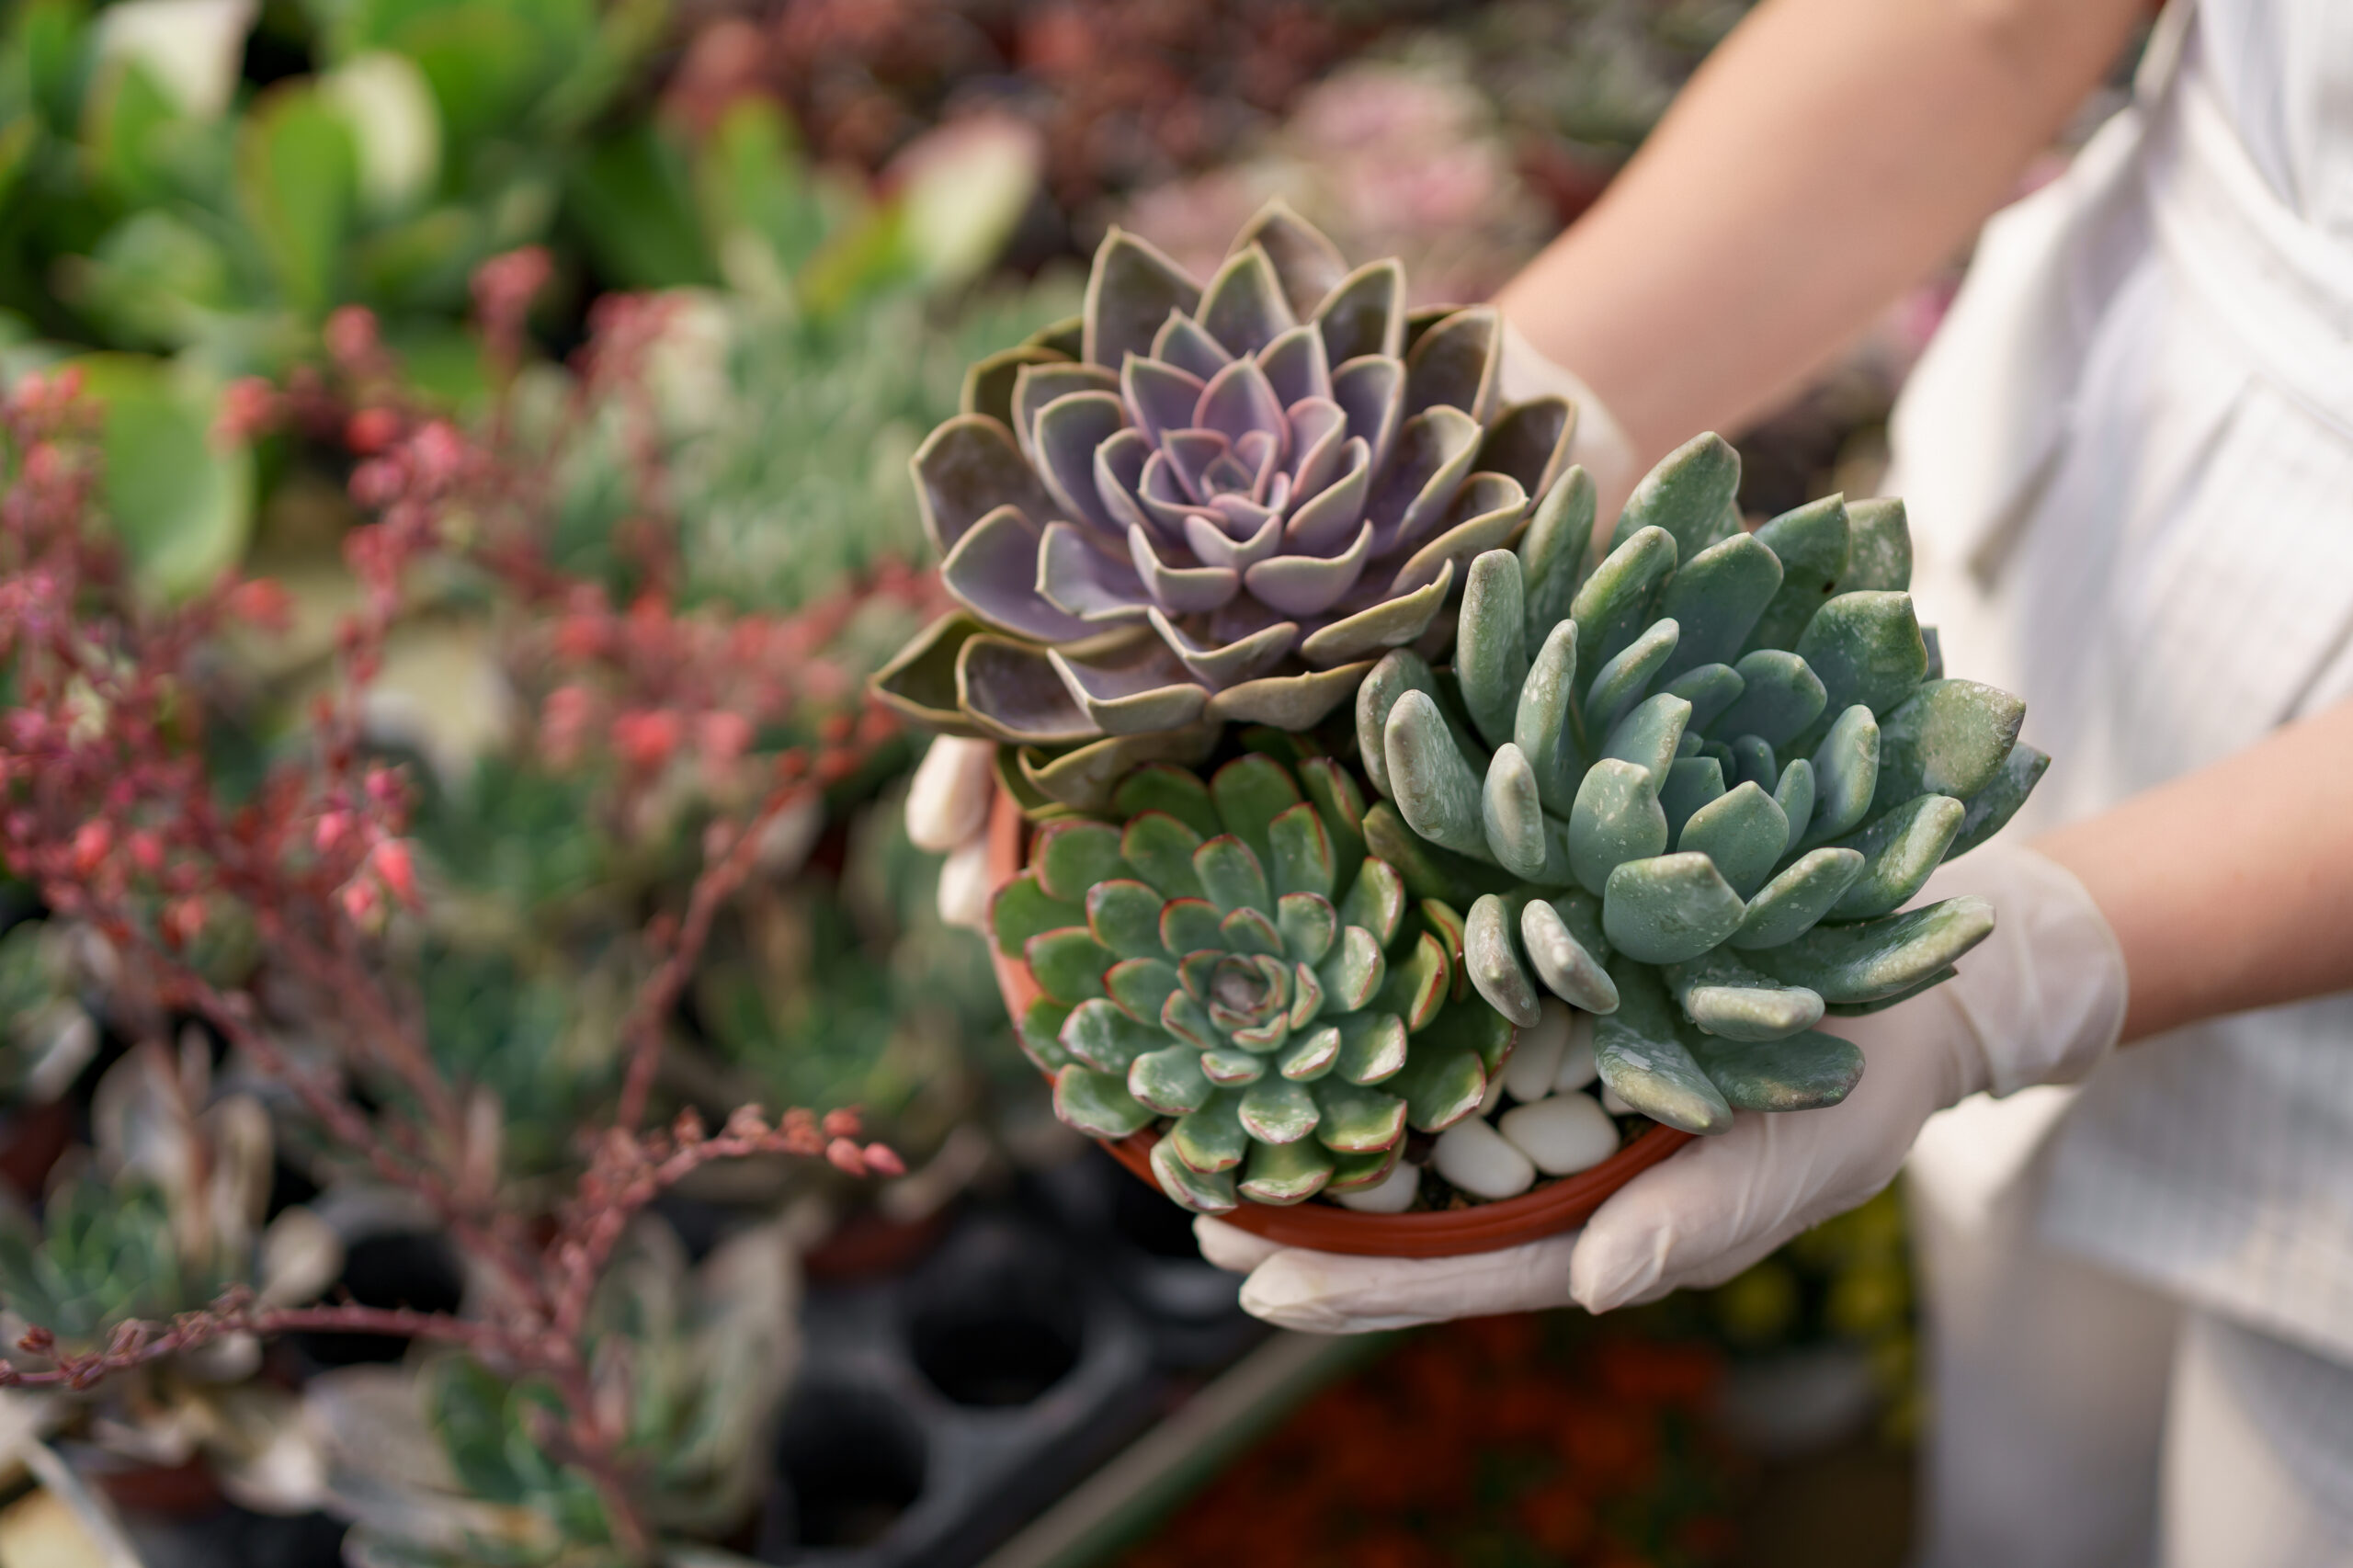
    Selecting the Right Succulents

    Creating a stunning succulent garden begins with choosing the right plants. Succulents come in a diverse array of species, each with its unique charm and care requirements. To design a garden that’s both visually appealing and harmonious, consider the following factors when selecting your succulents:

    • Climate Compatibility: Before anything else, assess your local climate. Some succulents thrive in arid, sun-soaked conditions, while others prefer milder climates. Choose species that are well-suited to your region’s climate to ensure their longevity.
    • Size and Shape: Succulents come in various sizes and shapes, from low-growing rosettes to tall, architectural forms. Plan your garden layout by mixing sizes and shapes to create a visually dynamic landscape.
    • Color Palette: The color palette of succulents ranges from calming greens to vibrant reds and purples. Decide on a color scheme that complements your garden’s overall design or theme, ensuring a cohesive and captivating look.
    • Texture and Form: Succulents exhibit diverse textures and forms. Some feature smooth, glossy leaves, while others are adorned with fine hairs or intricate patterns. Combining various textures and forms adds depth and intrigue to your garden’s visual appeal.

    By carefully selecting succulents that align with your garden’s location and design vision, you’ll set the stage for a visually captivating landscape that thrives in its environment.

    Designing Your Succulent Garden

    Designing a stunning succulent garden involves more than just planting your chosen specimens. It requires thoughtful planning and consideration of various design elements. Here’s how to design a succulent garden that’s both eye-catching and cohesive:

    • Layout and Arrangement: Start by deciding on the layout of your garden. Consider whether you want a container garden, a raised bed, or an in-ground garden. Each option offers different possibilities for arranging your succulents.
    • Focus Points: Create focal points within your garden by placing larger or particularly striking succulents in strategic locations. These focal points draw the eye and provide visual interest.
    • Color Coordination: Arrange succulents with complementary or contrasting colors in clusters. This not only enhances the aesthetics but also creates a harmonious balance of hues.
    • Height Variation: Use succulents of different heights to add dimension to your garden. Taller succulents can serve as backdrops, while shorter ones create foreground interest.
    • Spacing and Balance: Be mindful of spacing between succulents. Give them enough room to grow and spread, and achieve balance by distributing various succulent types evenly.
    • Enhancing Decor: Incorporate hardscaping elements like decorative rocks, pebbles, or driftwood to enhance the visual appeal of your succulent garden. Decorative containers or pots can also add charm to your garden design.

    Thoughtful garden design creates a captivating landscape that showcases the beauty of succulents and provides an inviting space for relaxation.

    Planting and Caring for Succulents

    Proper planting and maintenance are essential for the long-term health and beauty of your succulent garden. Follow these key steps to ensure your succulents thrive:

    • Well-Draining Soil: Succulents dislike standing water, so use a well-draining soil mix. You can also amend your garden soil with sand or perlite to improve drainage.
    • Planting Depth: When transplanting succulents, ensure they are at the same depth as they were in their previous container. This prevents rot and encourages healthy root development.
    • Watering: Succulents are drought-tolerant but require periodic watering. Water deeply, but allow the soil to dry out between waterings. Be cautious of overwatering, as it can lead to root rot.
    • Sunlight: Most succulents thrive in bright, indirect sunlight or partial shade. Place your garden in a location where it receives the appropriate amount of light for its species.
    • Fertilization: Use a balanced, water-soluble fertilizer diluted to half strength during the growing season (spring and summer). Avoid fertilizing in the dormant season.
    • Pruning and Maintenance: Trim dead or damaged leaves to encourage new growth. Remove spent flowers to promote additional blooms. Regular maintenance keeps your garden looking its best.
    • Protection from Frost: In cold climates, protect your succulents from frost by moving them indoors or providing cover during chilly nights.

    By following these planting and care guidelines, your succulent garden will flourish and continue to enchant visitors with its captivating beauty.

    Troubleshooting Common Issues

    Even well-maintained succulent gardens may encounter challenges. It’s important to recognize and address common issues promptly to ensure the health and vitality of your garden. Here are some common problems and solutions:

    • Overwatering: If you notice yellowing leaves or mushy stems, you may be overwatering. Allow the soil to dry out completely before watering again.
    • Underwatering: Symptoms of underwatering include shriveled or wrinkled leaves. Water your succulents when the soil is dry to the touch.
    • Pests: Common pests include mealybugs and aphids. Remove them with a gentle spray of water or use neem oil as a natural insecticide.
    • Rot: Root rot can occur due to excessive moisture. Ensure proper drainage and repot affected plants with fresh soil.
    • Leggy Growth: Succulents may become leggy (elongated stems) if they don’t receive enough sunlight. Move them to a brighter location to encourage compact growth.
    • Diseases: Keep an eye out for signs of fungal or bacterial diseases. Isolate affected plants and treat them with appropriate remedies to prevent the spread of infection.

    By addressing these issues promptly and effectively, you’ll maintain the health and beauty of your stunning succulent garden.

    Conclusion

    In conclusion, creating a stunning succulent garden is a gratifying journey that allows you to blend your creativity with the wonders of nature. By selecting the right succulents, designing your garden with care, and providing proper planting and maintenance, you can cultivate a garden that’s not only visually captivating but also easy to care for.

    Remember that each succulent variety has its unique charm, and designing your garden to showcase their individual beauty can result in a truly mesmerizing landscape. With the right combination of color, form, and texture, your succulent garden will become a source of joy and inspiration.

    So, roll up your sleeves, get your hands in the soil, and embark on this succulent adventure. With our step-by-step guide as your companion, you’re well-equipped to create a stunning succulent garden that will be the envy of all who behold it.

    Happy gardening, and may your succulent garden flourish in all its glory!

    Image by ArthurHidden on Freepik

  • How to Trim Shrubs and Bushes

    How to Trim Shrubs and Bushes

    Trimming shrubs and bushes is an essential practice for maintaining a thriving and visually appealing garden. As a gardener, understanding the “why” and “how” of shrub and bush trimming is key to achieving the best results. This comprehensive guide will walk you through the intricacies of proper trimming, from the reasons behind it to the techniques and tools you need for success. So, let’s embark on this journey and discover how to transform your garden into a vibrant oasis.

    Why Trim Shrubs and Bushes

    Trimming isn’t just about aesthetics; it’s about promoting growth, enhancing plant health, and maintaining an inviting outdoor space. When you trim your shrubs and bushes, you:

    • Promote Growth: Trimming stimulates new growth by encouraging branching and budding, resulting in a denser, more lush appearance.
    • Enhance Aesthetics: Well-trimmed shrubs and bushes improve the overall look of your garden, providing structure and symmetry.
    • Control Size: Overgrown shrubs can obstruct pathways and views; regular trimming ensures you maintain control over their size.
    • Remove Dead Growth: Dead branches harbor pests and diseases; trimming removes these hazards and promotes plant health.

    Understanding these reasons is essential to appreciating the significance of proper trimming.

    When to Trim Shrubs and Bushes

    Timing is crucial in shrub and bush trimming, as it significantly affects plant health. Consider these guidelines:

    • Spring Trimming: Spring is ideal for most shrubs, just before new growth begins. It’s the time to shape plants and remove dead or damaged branches.
    • After Flowering: For flowering shrubs, trim right after they bloom to preserve future blossoms.
    • Early Winter (Evergreens): Evergreens benefit from late fall to early winter trimming, maintaining their shape before harsh winter conditions set in.

    By understanding these timing nuances, you maximize the benefits of trimming.

    Tools You’ll Need

    Before you start, gather essential tools:

    • Pruning Shears: These are perfect for small branches and precise cuts.
    • Loppers: For thicker branches that pruning shears can’t handle.
    • Hedge Trimmers: Ideal for shaping hedges and formal bushes.
    • Gloves: Protect your hands from thorns and debris.
    • Safety Gear: Consider safety glasses or goggles to shield your eyes.

    Having these tools ensures efficient and clean cuts, critical for plant health.

    Trimming Techniques

    Mastering proper trimming techniques is essential. Remember:

    • Identify Dead Branches: Start by removing dead or diseased branches to safeguard plant health.
    • Prune at a 45-Degree Angle: Make clean cuts just above a bud or lateral branch at a slight angle for optimal healing.
    • Shape with Care: Trim for the desired shape, but avoid over-pruning to prevent stress and diminished growth.
    • Step Back and Assess: Periodically step back to evaluate progress and maintain overall balance.

    These techniques will help you achieve the desired results.

    Tips for Success

    Achieving success in shrub and bush trimming involves more than techniques and tools. Consider:

    • Regular Maintenance: Make trimming a routine to keep plants healthy.
    • Know Your Plants: Different shrubs have varying trimming needs; research specific requirements.
    • Timing Matters: Trim at the right season for your plants.
    • Dispose of Debris: Properly dispose of cuttings to prevent disease spread.
    • Seek Expert Advice: Consult gardening experts or local nurseries for guidance.

    Incorporating these tips into your routine ensures a thriving garden.

    Conclusion

    In conclusion, mastering the art of trimming shrubs and bushes is a rewarding endeavor for any gardener. By understanding the “why” behind trimming and following best practices, you can transform your garden into a lush and vibrant oasis. Remember to assess your plant’s needs, stay attentive to timing, and wield your tools with care. Your garden will thank you with bountiful growth, stunning appearances, and a thriving atmosphere.

    We hope this comprehensive guide has equipped you with the knowledge and confidence to become a proficient shrub and bush trimmer. Happy trimming, and may your garden flourish in all its glory!

    Image by ArtPhoto_studio on Freepik

  • How to prune a Pear tree

    How to prune a Pear tree

    How to Prune a Pear Tree: A Comprehensive Guide

    Keywords: Pruning pear tree, how to prune, pear tree care, tree pruning, pear tree maintenance

    Meta Description: Learn the art of pruning a pear tree with our step-by-step guide. Discover the best time to prune, essential tools, and expert tips for a thriving pear tree in your garden.


    Why Prune a Pear Tree?

    Pruning a pear tree serves several important purposes:

    1. Promoting Growth: Pruning encourages new growth and helps maintain the desired shape and size of the tree.
    2. Fruit Production: Proper pruning increases fruit production by allowing sunlight and air circulation into the canopy, leading to larger and better-quality pears.
    3. Disease Prevention: Removing dead or diseased branches reduces the risk of pests and diseases from spreading throughout the tree.
    4. Structural Strength: Pruning helps develop a strong scaffold structure, reducing the risk of limb breakage due to heavy fruit loads.

    When to Prune a Pear Tree

    Timing is crucial when it comes to pruning pear trees. The best time to prune is during the dormant winter months, typically between late November and early March. Avoid pruning during the active growing season, as it can stress the tree.

    Essential Tools for Pruning

    Before you start, gather the necessary tools to ensure a clean and effective pruning process:

    • Pruning Shears: Ideal for cutting small branches and twigs.
    • Loppers: Use loppers for branches with a diameter of up to 2 inches.
    • Hand Saw: For larger branches that loppers cannot handle.
    • Pruning Paint: To seal cuts and prevent disease entry.
    • Safety Gear: Wear gloves and safety glasses to protect yourself from sharp branches and debris.

    Step-by-Step Guide to Pruning

    Follow these steps to successfully prune your pear tree:

    1. Assess the Tree: Start by closely examining your pear tree. Identify dead, diseased, or damaged branches. Look for branches that cross or rub against each other, as they can create wounds and invite diseases.
    2. Remove Dead and Diseased Branches: Using your pruning shears or loppers, carefully remove all dead and diseased branches. Make clean cuts just outside the branch collar, the raised area where the branch meets the trunk.
    3. Address Crossed or Overlapping Branches: Eliminate branches that cross or overlap, as they can hinder airflow and promote disease. Prioritize the removal of inward-growing branches.
    4. Thin Out Crowded Areas: In dense areas of the canopy, thin out branches to allow sunlight and air to penetrate. This encourages better fruit development and reduces the risk of fungal diseases.
    5. Shape the Tree: Prune for the desired shape, focusing on maintaining an open center or vase shape. Keep the central leader (the main vertical stem) intact and prune lateral branches to create a balanced structure.
    6. Seal the Cuts: After pruning, apply pruning paint or a sealant to cover the cut surfaces. This helps prevent disease entry and promotes healing.

    Tips for Successful Pear Tree Pruning

    • Start Early: Begin pruning your pear tree when it’s young to establish a strong structure.
    • Moderation: Avoid excessive pruning, as it can stress the tree and reduce fruit production.
    • Regular Maintenance: Plan for annual or biennial pruning to maintain the tree’s health and shape.
    • Sanitize Tools: Disinfect your pruning tools before and after use to prevent disease transmission.
    • Monitor Growth: Keep an eye on your tree throughout the growing season, making minor adjustments as needed.

    Conclusion

    Pruning a pear tree is a valuable skill for any orchard owner or gardening enthusiast. By following the steps and tips outlined in this guide, you can ensure your pear tree remains healthy, fruitful, and visually appealing year after year. Happy pruning and enjoy the bountiful harvests!

    Photo by Marta Dzedyshko

  • How to prune a Butterfly bush

    How to prune a Butterfly bush

    Pruning Butterfly Bush: A Comprehensive Guide

    Keywords: Butterfly bush pruning, when to prune butterfly bush, how to prune buddleia, butterfly bush care, pruning tips for butterfly bush

    Meta Description: Learn the art of pruning a butterfly bush with our step-by-step guide. Discover the best time to prune, essential tools, and expert tips for a thriving buddleia in your garden.


    Why Prune a Butterfly Bush?

    Pruning your butterfly bush is not just about aesthetics; it’s also vital for the plant’s health and longevity. Here are some reasons why pruning is necessary:

    1. Shape and Size Control: Pruning helps maintain the desired shape and size of your butterfly bush, preventing it from becoming overgrown and unruly.
    2. Increased Blooms: Proper pruning encourages the development of more flowers, leading to a more vibrant and colorful garden.
    3. Removal of Dead Growth: Trimming away dead or diseased branches promotes overall plant health and reduces the risk of pests and diseases.
    4. Improved Air Circulation: Thinning out the bush allows better airflow, which can help prevent mildew and other fungal issues.

    When to Prune a Butterfly Bush

    Timing is crucial when it comes to pruning your butterfly bush. The right time to prune depends on your location and the specific type of butterfly bush you have. Generally, there are two main pruning times:

    1. Spring Pruning (Hard Pruning):
      • Best for non-native butterfly bush varieties.
      • Perform this heavy pruning in early spring, before new growth starts.
      • Cut the bush back to about 6-12 inches from the ground.
      • This encourages vigorous new growth and more blooms in the summer.
    2. Late Summer to Early Fall Pruning (Light Pruning):
      • Ideal for native butterfly bush varieties.
      • Trim lightly in late summer to early fall after the plant has finished flowering.
      • Remove dead or spent flower spikes and any diseased or damaged branches.
      • Leave about 1-2 feet of the current season’s growth.

    Tools for Pruning

    Before you start pruning your butterfly bush, gather the necessary tools to ensure a clean and efficient process. Here’s what you’ll need:

    1. Pruning Shears: Use sharp pruning shears for precision cuts, especially when dealing with smaller branches and spent blooms.
    2. Loppers: Loppers are essential for cutting thicker branches that pruning shears can’t handle.
    3. Hand Saw: For large, woody branches, a hand saw may be required.
    4. Gloves: Protect your hands from thorns and potential irritants with a sturdy pair of gardening gloves.
    5. Safety Glasses: Safety glasses or goggles are crucial to shield your eyes from debris while pruning.
    6. Disinfectant: To prevent the spread of diseases, disinfect your pruning tools before and after each use.

    Step-by-Step Guide to Pruning a Butterfly Bush

    Now that you have your tools ready, let’s dive into the process of pruning a butterfly bush:

    Step 1: Assess the Bush

    Start by evaluating your butterfly bush’s overall health and shape. Identify any dead, damaged, or diseased branches that need removal.

    Step 2: Prune Dead and Diseased Branches

    Using your pruning shears or loppers, carefully cut away any dead or diseased branches at the base of the bush. Make clean, angled cuts to facilitate healing.

    Step 3: Remove Spent Flower Spikes

    Look for faded or spent flower spikes, and trim them back to a healthy set of leaves or buds. This encourages continuous blooming and prevents seed formation, which can lead to self-seeding and potential invasiveness.

    Step 4: Thin Out Overcrowded Growth

    If your butterfly bush has become crowded and dense, selectively prune some of the older, woody branches at ground level to improve air circulation and light penetration.

    Step 5: Shape and Size Control

    To maintain the desired shape and size of your butterfly bush, trim back the remaining branches to your preferred height and shape. Make cuts just above a leaf node or bud.

    Step 6: Clean Up

    Collect and dispose of all pruned branches and debris properly. Remember to disinfect your pruning tools when you’re done to prevent the spread of diseases to other plants.

    Tips for Successful Butterfly Bush Pruning

    • Avoid Over-Pruning: While it’s important to prune for health and shape, avoid excessive pruning, as it can stress the plant and reduce next year’s blooms.
    • Regular Maintenance: Regular, light pruning is often more effective than drastic annual pruning. This helps maintain a natural shape and minimizes stress on the bush.
    • Mulch and Fertilize: Apply mulch around the base of your butterfly bush to retain moisture and provide nutrients. Fertilize in the spring to encourage healthy growth.
    • Watering: Keep your butterfly bush adequately watered, especially during dry spells, to ensure it thrives.

    Conclusion

    Pruning a butterfly bush is a straightforward process that, when done correctly, can lead to a healthier, more vibrant, and better-shaped plant. By following the steps outlined in this guide and considering the specific needs of your butterfly bush variety, you can enjoy a stunning garden filled with beautiful blooms and happy pollinators.

    Remember that proper pruning is an art, and it may take some trial and error to find the perfect pruning routine for your specific butterfly bush. With patience and care, you can master the skill of butterfly bush pruning and watch your garden flourish with life and color.

    Photo by cottonbro studio

  • How to delete a YouTube channel

    How to delete a YouTube channel

    If you’ve decided it’s time to part ways with your YouTube channel, you need to follow the correct steps to delete it permanently. Deleting a YouTube channel removes all associated content, including videos, playlists, comments, and subscribers. Whether you’re rebranding, no longer wish to maintain a channel, or have other reasons, this guide will provide you with a comprehensive, step-by-step process for deleting your YouTube channel.

    Here’s a comprehensive guide on how to delete your YouTube channel:

    1. Sign In to Your Google Account: Firstly, ensure you’re signed in to the Google account linked to the YouTube channel you want to delete. You must have ownership or manager permissions for the channel.

    2. Access YouTube Studio: Open your web browser and visit [YouTube Studio](https://studio.youtube.com/), where you can manage your YouTube channel. Once there, you can proceed to delete your channel.

    3. Select Your Channel: On the left-hand menu, click “Settings.” In the “Channel” section, locate your channel name and profile picture. Click your channel name to access its settings.

    4. Access Advanced Settings: In the channel settings, click “Advanced Settings.” This takes you to a page where you can manage various aspects of your channel effectively.

    5. Delete Channel: Scroll down to the bottom of the “Advanced Settings” page, and you’ll find the “Delete Channel” option. Click it to initiate the deletion process.

    6. Verify Your Identity: YouTube will prompt you to confirm your identity by entering your Google account password. After entering your password, click “Next” to proceed.

    7. Delete Channel Permanently: You will see the option to “Delete Channel Permanently.” Click it to proceed with the permanent deletion. At this point, your decision becomes irreversible.

    8. Additional Verification: For added security, YouTube may request additional verification, such as sending a verification code to your registered email address or phone number. Enter the code to proceed smoothly.

    9. Confirmation: After successfully completing the verification, YouTube will display a confirmation message. This message emphasizes that your channel and all its content will be permanently deleted. Take a moment to carefully review this message to ensure you understand the consequences.

    10. Delete My Channel: To finalize the deletion, you must enter your channel name (as a security measure). Type your channel name exactly as shown and click “Delete My Channel.”

    11. Done: Upon successful completion, you will receive a confirmation message indicating that your YouTube channel has been deleted. Please be aware that this action is irreversible.

    Important considerations:

    – Deleting your YouTube channel results in the removal of all videos, comments, playlists, and subscribers associated with it.
    – Furthermore, you lose access to any paid content, memberships, and monetization on your channel.
    – Make sure to download any essential videos or data before deleting your channel.

    Keywords Used: Delete YouTube channel, How to delete a YouTube channel, Permanently remove YouTube channel, YouTube channel deletion process, Close my YouTube account

    Photo by cottonbro studio

  • How to remove a page break in Word

    How to remove a page break in Word

    Microsoft Word is a versatile word processing tool, but sometimes, page breaks can be inserted unintentionally or in the wrong place, disrupting the flow of your document. Fortunately, removing a page break in Word is a straightforward process. In this guide, we will walk you through the steps to remove a page break and ensure your document appears as you intend.

    Step 1: Open Your Document

    Launch Microsoft Word and open the document from which you want to remove the page break.

    Step 2: Display Non-Printing Characters

    To see page breaks and other non-printing characters, click on the “Home” tab in the Word ribbon. In the “Paragraph” group, you will find a button with a pilcrow (¶) symbol. Click this button to toggle the display of non-printing characters.

    Step 3: Locate the Page Break

    Scroll through your document to find the page break you want to remove. Page breaks are represented by a horizontal line with the word “Page” in the center.

    Step 4: Select the Page Break

    Click just before the page break to place your cursor at the end of the preceding page.

    Step 5: Delete the Page Break

    Press the “Delete” key on your keyboard. The page break will be removed, and the content from the next page will move up to the current page.

    Step 6: Verify Your Document

    Scroll through your document to ensure that the removal of the page break has not caused any unintended formatting issues. Make any necessary adjustments to the layout or formatting as needed.

    Step 7: Save Your Document

    Once you are satisfied with the changes, save your document to ensure that the removal of the page break is retained.

    Keywords Used: remove page break, Microsoft Word, page break removal, document formatting, Word document editing.

    Image by J S from Pixabay

  • How to sew a hole in a sock

    How to sew a hole in a sock

    Socks are a wardrobe essential, and it’s not uncommon for them to develop holes over time. Instead of tossing out your favorite pair, you can easily repair them with a few simple sewing techniques. In this guide, we will walk you through the steps to sew a hole in a sock and extend its life.

    Materials You’ll Need

    Before you begin, gather the following materials:

    – Needle
    – Thread (matching the color of your sock)
    – Scissors
    – A small piece of fabric (optional)
    – Pins (optional)

    Step 1: Identify the Hole

    Examine your sock to locate the hole. Depending on its size, you may need to decide whether to use a simple sewing technique or employ a patch.

    Step 2: Thread the Needle

    Cut a length of thread (about 18 inches) and thread it through the eye of the needle. Double up the thread and tie a knot at the end to secure it.

    Step 3: Sewing a Small Hole

    If the hole is small, you can use a basic sewing method. Insert the needle from the inside of the sock and pull it through, closing the hole. Repeat this process in a zigzag pattern, gradually closing the hole until it’s fully mended. Ensure that your stitches are tight and secure.

    Step 4: Sewing a Larger Hole

    For larger holes, consider using a small piece of fabric as a patch. Cut the fabric into a shape that covers the hole with a little extra for overlap. Place the patch over the hole on the inside of the sock and pin it in place if needed. Thread your needle and sew around the edges of the patch, securing it to the sock. Continue sewing in a zigzag pattern, covering the entire hole.

    Step 5: Secure the Thread

    Once the hole is fully closed or the patch is securely attached, create a knot by passing the needle through the fabric and looping the thread around it a couple of times. Pull it tight to secure, and trim any excess thread.

    Step 6: Test the Sock

    Put the sock on and ensure that the repair feels comfortable and secure. Trim any fabric or thread ends that may be poking through.

    Step 7: Reinforce High-Wear Areas

    To prevent future holes in high-wear areas like the heel or toe, consider reinforcing these areas with extra stitches or patches. This proactive approach can extend the lifespan of your socks.

    Conclusion

    Learning how to sew a hole in a sock is a handy skill that can save you money and reduce waste. With a few basic sewing techniques, you can mend your socks and enjoy them for an extended period. Don’t be quick to discard your favorite pairs; give them a second life through simple repairs.

    Now that you know how to sew a hole in a sock, you can tackle this common wardrobe issue with confidence. Keep your socks in good condition, and they’ll continue to keep your feet comfortable for many wears to come.

    Keywords Used: sew a hole in a sock, sock repair, mending socks, sewing technique, sock maintenance.

    Photo by Lum3n

  • How to sew a button

    How to sew a button

    Buttons are tiny yet essential components of our clothing. They serve both functional and decorative purposes, but what happens when one pops off? Don’t worry, sewing a button is a valuable skill that can save your favorite shirt or jacket from retirement. In this guide, we will walk you through the steps to sew a button back securely.

    Step 1: Gather Your Materials

    Before we dive into the sewing process, ensure you have the following materials at hand:

    – Needle
    – Thread (matching the color of your fabric)
    – Button
    – Scissors
    – A pin or toothpick (optional)

    Step 2: Thread the Needle

    Cut a length of thread (about 18 inches) and thread it through the eye of the needle. Double up the thread and tie a knot at the end, creating a double thread. This will make your stitching more secure.

    Step 3: Position the Button

    Decide where you want to attach the button on your garment. If it’s replacing a lost button, look for the spot where the previous button was attached. If it’s decorative, choose a position that complements the design.

    Step 4: Create an Anchor

    To prevent the knot from pulling through the fabric, start from the inside of the garment (the wrong side). Push the needle up through the fabric and then back down to create an anchor for your thread.

    Step 5: Sew on the Button

    Position the button over the anchor point. Pass the needle up through one of the buttonholes and then down through the opposite buttonhole. Repeat this process several times, making sure the button is securely attached.

    Step 6: Create Shank (Optional)

    If your button has holes on the flat side, you may want to create a shank. To do this, after passing through the buttonholes, wrap the thread around the threads between the button and the fabric several times. This raises the button slightly, allowing room for the fabric beneath it when you fasten the garment.

    Step 7: Secure the Thread

    Once the button is secure, create another anchor on the inside of the garment by passing the needle through the fabric. Tie a knot with the loose end of the thread and trim any excess.

    Step 8: Final Checks

    Before finishing, test the button to ensure it’s securely fastened and that it aligns properly with the buttonhole. Make any necessary adjustments if needed.

    Step 9: Choosing the Right Thread and Button

    When it comes to sewing on a button, the choice of thread and button can significantly impact the durability and appearance of your repair. For most garments, it’s essential to select a thread that closely matches the color of the fabric. If you can’t find an exact match, opt for a slightly darker shade rather than a lighter one, as it will be less noticeable.

    Additionally, consider the type and size of the button. Buttons come in various materials, such as plastic, metal, and wood, each offering a unique look. Ensure the button you choose complements the style of your clothing. Furthermore, if the fabric is thick or heavy, select a button with larger holes to accommodate the doubled-up thread more easily. Paying attention to these details will result in a more professional and aesthetically pleasing outcome.

    Step 10: Maintaining Your Clothing

    Knowing how to sew a button is a valuable skill that extends the lifespan of your clothing. It’s a quick and cost-effective way to make minor repairs and prevent the need for expensive alterations or replacements. Regularly check your garments for loose buttons or missing ones, especially before laundering. By promptly addressing button issues, you can keep your wardrobe in excellent condition and continue to enjoy your favorite clothes for years to come.

    In conclusion, sewing a button is a simple yet essential skill that can save you both time and money. With the right tools and a bit of practice, you can confidently repair loose or lost buttons on your clothing. Remember that attention to detail, from choosing the right thread and button to securing your stitches, is key to a successful outcome. By mastering this basic sewing technique, you’ll be better equipped to maintain your wardrobe and extend the life of your garments.

    Photo by Pavel Danilyuk

  • How to clean carpet on stairs

    How to clean carpet on stairs

    Carpeted stairs are a common feature in many homes. They not only provide comfort underfoot but also enhance the overall aesthetic of your living space. However, over time, carpeted stairs can accumulate dirt, stains, and odors, making them look less appealing. Regular cleaning is essential to maintain their beauty and prolong their lifespan. In this guide, we’ll walk you through the steps to effectively clean carpet on stairs.

    Gather Your Cleaning Supplies

    Before you begin, gather the necessary cleaning supplies. You’ll need:

    • Vacuum Cleaner: Choose a vacuum cleaner with an upholstery attachment to effectively remove loose dirt and debris.
    • Carpet Cleaning Solution: Select a mild carpet cleaning solution that is safe for your specific carpet material.
    • Bucket of Warm Water: You’ll need this to dilute and apply the cleaning solution.
    • Soft-Bristle Brush or Scrubbing Brush: Opt for a brush with soft bristles to avoid damaging the carpet fibers.
    • Clean White Cloths or Sponges: These will be used for blotting and cleaning specific spots or stains.

    Step 1: Vacuum Thoroughly

    Start by vacuuming the entire carpeted staircase. Use the upholstery attachment to get into crevices and corners. Vacuuming will help remove loose dirt, dust, and debris, making the cleaning process more effective.

    Step 2: Prepare the Cleaning Solution

    Follow the manufacturer’s instructions to prepare the carpet cleaning solution. Typically, you’ll need to dilute it with water in a bucket. Ensure you use the recommended ratio for the best results.

    Step 3: Spot Test

    Before applying the cleaning solution to the entire staircase, perform a spot test in an inconspicuous area. This ensures that the solution won’t cause discoloration or damage to your carpet. Wait for a few minutes and check for any adverse reactions.

    Step 4: Apply the Cleaning Solution

    Dip a soft-bristle brush or a scrubbing brush into the cleaning solution. Gently scrub the soiled areas of the carpet on the stairs. Use a circular motion and be careful not to oversaturate the carpet.

    Step 5: Scrub Gently

    To remove stains and dirt effectively, use a gentle but consistent scrubbing motion. Avoid applying excessive pressure, as it can damage the carpet fibers.

    Step 6: Blot the Carpet

    After scrubbing, use clean white cloths or sponges to blot the area. Blotting helps absorb excess moisture and lift away dirt and stains. Repeat this process until you no longer see dirt transferring to the cloth.

    Step 7: Rinse

    Once you’ve cleaned the soiled areas, rinse the cleaned areas with clean water. Use a separate cloth to blot and remove any residual cleaning solution. Ensure all cleaning solution is thoroughly removed.

    Step 8: Allow to Dry

    Allow the carpet on the stairs to air dry completely. Avoid walking on the wet carpet until it’s dry to prevent dirt from sticking to damp fibers.

    Tips for Effective Stair Carpet Cleaning

    • Regularly vacuum your stairs to prevent dirt from accumulating.
    • Address spills and stains promptly to prevent them from setting into the carpet.
    • Use a white cloth or sponge to avoid transferring dye from colored materials to the carpet.
    • For persistent stains or heavily soiled carpets, consider seeking professional carpet cleaning services.

    Conclusion

    By following these steps and maintaining a regular cleaning schedule, you can keep the carpet on your stairs clean, fresh, and looking like new. Clean carpets not only enhance the aesthetics of your home but also contribute to a healthier indoor environment.

    Incorporate these cleaning practices into your routine, and your carpeted stairs will continue to provide comfort and style for years to come.

    Keywords: clean carpet on stairs, stair carpet cleaning, carpeted stairs, DIY carpet cleaning

    Photo by Erik Mclean

  • How to clean carpet by hand

    How to clean carpet by hand

    Carpet cleaning can be a daunting task, but sometimes, you need to roll up your sleeves and do it by hand. Whether it’s a small stain or a thorough cleaning, here’s how to clean your carpet without fancy equipment.

    Gather Your Cleaning Supplies

    Before you start, make sure you have the following supplies ready:

    • Bucket of warm water
    • Mild carpet cleaning solution
    • Soft-bristle brush or scrubbing brush
    • Clean white cloth or sponge
    • Vacuum cleaner

    Steps to Clean Your Carpet

    1. Vacuum: Start by thoroughly vacuuming the carpet to remove loose dirt and debris.
    2. Prepare Cleaning Solution: Mix the mild carpet cleaning solution with warm water in the bucket according to the manufacturer’s instructions.
    3. Spot Test: Test a small, inconspicuous area of the carpet with the cleaning solution to ensure it doesn’t cause discoloration or damage.
    4. Apply Solution: Dip the brush or sponge into the cleaning solution and gently scrub the stained or soiled areas of the carpet.
    5. Scrub: Use a circular motion and be gentle to avoid damaging the carpet fibers.
    6. Blot: After scrubbing, blot the area with a clean white cloth to absorb excess moisture and dirt.
    7. Rinse: Rinse the cleaned area with clean water and blot again to remove any residue.
    8. Dry: Allow the carpet to air dry completely before walking on it.

    Tips for Effective Carpet Cleaning

    • Address spills and stains promptly to prevent them from setting into the carpet.
    • Don’t oversaturate the carpet with cleaning solution; it can lead to mold and mildew growth.
    • Use a white cloth to avoid transferring dye from colored cloths to the carpet.
    • If the stain persists, consider seeking professional carpet cleaning services.

    Conclusion

    Cleaning your carpet by hand can be an effective way to maintain its beauty and cleanliness. With the right supplies and proper techniques, you can tackle stains and keep your carpet looking its best.

    Keywords: clean carpet by hand, carpet cleaning, carpet stain removal, DIY carpet cleaning

    Image by gpointstudio on Freepik