Blog

  • How to remove yellow stains from white shoes

    How to remove yellow stains from white shoes

    When you invest in a pair of white shoes, you want them to look pristine and clean all the time. But unfortunately, over time, your white shoes are likely to get yellow stains due to dirt, sweat, and grime.

    Getting rid of yellow stains on your white shoes can be a bit tricky, but it’s not impossible. Here are some tips on how to remove yellow stains from white shoes:

    1. Use a toothbrush and baking soda paste: Make a paste by combining baking soda and water. Dip a toothbrush into the paste and scrub the yellow stains on your white shoes. This will help to lift the dirt and grime, leaving your shoes looking as good as new.

    2. Use a vinegar mixture: Combine equal parts of white vinegar and water and apply it to the yellow stains. Let it sit for 10-15 minutes and then wipe it off with a damp cloth. This will help to remove the yellow stains from your white shoes.

    3. Use lemon juice: Lemon juice is a natural bleaching agent, so it’s great for removing yellow stains from white shoes. Just apply some fresh lemon juice on the stains and let it sit for a few minutes. Then, wipe it off with a damp cloth and the yellow stains should be gone.

    4. Use a hydrogen peroxide solution: Hydrogen peroxide is a natural bleaching agent that can help to remove yellow stains from white shoes. Combine equal parts of hydrogen peroxide and water and apply it to the stains. Let it sit for 15 minutes and then wipe it off with a damp cloth.

    5. Use a commercial cleaner: If all else fails, you can always use a commercial cleaner to remove the stains from your white shoes. There are a variety of different products available that are specifically designed to tackle this type of problem. Just make sure to read the instructions carefully before using any product.

    These are some of the best tips on how to remove yellow stains from white shoes. With just a bit of effort, you can make your white shoes look as good as new again.
    Photo by Raoul Croes on Unsplash

  • How to clean the microwave

    How to clean the microwave

    Cleaning the microwave is one of those household chores that can seem daunting, but it doesn’t have to be. With the right supplies and a few simple steps, you can make your microwave look like new again. Here’s how to clean a microwave in just a few easy steps.

    1. Start by removing any food or debris from the interior of the microwave. Use a damp cloth to wipe away any food particles or spills. For stuck-on food, try soaking a sponge in a mixture of warm water and dishwashing liquid and then use a scrubbing pad to remove it.

    2. Next, fill a microwave-safe bowl or cup with 1/2 cup of water and add 2 tablespoons of white vinegar. Place the bowl or cup inside the microwave and turn it on for 5 minutes. This will help to loosen any stuck-on food and make it easier to wipe away.

    3. Once the timer has gone off, leave the bowl or cup inside the microwave and let it cool down for a few minutes. This will help to further loosen any stuck-on food and make it easier to remove.

    4. Once the bowl or cup is cool enough to handle, use a damp cloth to wipe away any food particles or spills. For tougher spots, use a scrubbing pad or an old toothbrush to help scrub them away.

    5. Finally, use a damp cloth to clean the exterior of the microwave and then wipe it dry with a clean, dry cloth.

    And that’s it! With just a few simple steps, you can have your microwave looking like new again. With regular cleaning, you can keep your microwave looking shiny and clean.
    Image by zinkevych on Freepik

  • How to clean a range hood filter

    How to clean a range hood filter

    Keeping your kitchen clean is essential for a healthy cooking environment. One often overlooked but vital component of your kitchen is the range hood filter. A clean filter not only ensures that your kitchen stays free of unpleasant odors but also helps maintain the efficiency of your appliance. In this comprehensive guide, we’ll walk you through the steps of how to clean a range hood filter effectively.

    Why Cleaning Your Range Hood Filter Matters

    Before we dive into the cleaning process, let’s understand why it’s crucial to keep your range hood filter clean. Over time, the filter collects grease, smoke, and other particles from cooking. If left uncleaned, it can become clogged, reducing the effectiveness of your range hood. A clogged filter can’t effectively remove smoke and odors, making your kitchen less comfortable to cook in.

    Tools and Materials You’ll Need

    Before you begin cleaning, gather the following tools and materials:

    • Warm, soapy water
    • Baking soda
    • Soft-bristle brush
    • Bucket
    • Dishwashing detergent
    • Newspaper or plastic bags

    Step-by-Step Cleaning Process

    Now, let’s proceed with the cleaning process:

    Step 1: Turn Off Power

    Safety first! Before you start, ensure that your range hood is turned off and disconnected from the power source to avoid any accidents.

    Step 2: Remove the Filter

    Most range hood filters are easily removable. Consult your range hood’s manual for instructions on how to remove the filter. Typically, you’ll need to unclip or unscrew it.

    Step 3: Soak in Soapy Water

    Fill a bucket with warm, soapy water. Add a few tablespoons of baking soda to the water and mix well. Submerge the filter in the soapy water and let it soak for 10-15 minutes. This will help loosen the built-up grease and grime.

    Step 4: Scrub Gently

    After soaking, use a soft-bristle brush to scrub the filter. Pay special attention to areas with heavy grease buildup. Scrub both sides of the filter until it looks clean and free of residue.

    Step 5: Rinse and Dry

    Rinse the filter thoroughly with clean water to remove any remaining soap or baking soda. Shake off excess water and allow the filter to air dry completely.

    How Often Should You Clean Your Range Hood Filter?

    It’s recommended to clean your range hood filter every 1-3 months, depending on your cooking frequency. If you frequently cook greasy foods, more frequent cleaning may be necessary. A clean filter will ensure that your range hood operates efficiently and keeps your kitchen air fresh.

    Conclusion

    Regularly cleaning your range hood filter is a simple yet essential task that contributes to a clean and comfortable kitchen environment. By following these easy steps and maintaining a routine cleaning schedule, you can ensure that your range hood performs optimally and keeps your kitchen air free of odors and grease.

    Photo by Created Stories

  • How to clean an induction hob

    How to clean an induction hob

    Induction hobs are becoming increasingly popular in kitchens across the world, thanks to their ease of use and efficient heating. However, like all kitchen appliances, they require regular cleaning and maintenance to keep them in top condition. Here’s how to clean an induction hob properly and keep it looking and feeling like new.

    1. Unplug the hob: Before you start cleaning, make sure that you unplug the hob from the power source. This is a crucial safety step that prevents electric shock.

    2. Wipe off the surface: Use a damp cloth to wipe off any spills or splatters on the hob’s surface.

    3. Use a glass cleaner: Spray glass cleaner on the hob’s surface and use a clean cloth to wipe it off. This will remove any grease and grime from the surface and make it look shiny and new.

    4. Clean the burners: Use a damp cloth to clean the burners. Make sure to use gentle circular motions to remove any dirt or debris.

    5. Clean the control panel: Use a damp cloth to wipe down the control panel. Make sure to clean all the buttons and knobs.

    6. Clean the vents: Use a small brush to clean the vents. Make sure to get into all the nooks and crannies as dirt can accumulate in these areas.

    7. Use a stainless steel cleaner: Spray stainless steel cleaner on the hob and use a clean cloth to wipe it off. This will remove any streaks or smudges that are on the surface.

    8. Clean the surrounding area: Finally, use a damp cloth to clean the surrounding area. Make sure to get rid of any crumbs or debris that may have accumulated around the hob.

    By following these steps, your induction hob should be clean and ready to use. Remember to use gentle cleaning products and cloths to ensure that you don’t damage the surface of the hob. Regular cleaning will help extend the life of your induction hob and keep it looking like new.

    Photo by Max Rahubovskiy

  • How to clean the oven door

    How to clean the oven door

    If you’re like most people, you don’t like to think about cleaning your oven door. But the truth is that it’s a necessary task that needs to be done to keep your oven in good condition and to make sure it’s working properly. Fortunately, it’s not as hard as you may think. Here’s how to clean the oven door in just a few simple steps.

    1. Start by removing the oven door. This can usually be done by opening the oven door and then pressing the two levers on the side of the oven frame that hold the door in place. Once the door is removed, place it on a flat surface.

    2. Now, it’s time to start cleaning. Begin by wiping down the door with a damp cloth or sponge. This will help remove any dirt, grease, or food particles that have built up over time.

    3. Next, you’ll want to make a cleaning solution. You can use a combination of baking soda, white vinegar, and hot water to create a paste-like consistency. Apply the paste to the door and use a scrub brush or sponge to scrub the paste into the door.

    4. Once the door is cleaned, rinse it off with warm water and dry it with a clean cloth. You may also want to use a polishing product to give the door a nice shine.

    5. Finally, it’s time to put the door back in place. Slide the door back into the oven frame and make sure the hinges are aligned correctly. Close the door and you’re all done!

    Cleaning your oven door may seem like a daunting task, but it’s actually quite simple. By following these steps, you can easily keep your oven door clean and looking like new.
    Photo by Erik Mclean on Unsplash

  • How to make proper English tea

    How to make proper English tea

    When it comes to creating a truly enjoyable cup of tea, knowing how to make proper English tea is essential. It’s a skill steeped in tradition and a ritual passed down from generation to generation. Making a good cup of tea is more than just a process—it’s an art form that embodies the essence of English culture. This guide will show you how to make a proper cup of English tea with easy-to-follow steps.

    The Essence of English Tea

    English tea is more than a beverage; it’s a cultural experience that evokes feelings of comfort and community. To know **how to make proper English tea**, you must appreciate the history and ritual behind it. From the traditional tea parties of yesteryear to the cozy tea times of today, English tea brings people together in a way that few other drinks can.

    To truly understand the essence of English tea, one must embrace the slower pace it represents. Unlike other beverages that are consumed on the go, tea is best enjoyed when you take your time, appreciating each sip and the moments it creates. This mindset aligns with the famous British idiom, “It’s as easy as tea,” which underscores the simplicity and comfort that tea provides.

    The Foundation: Freshly Boiled Water

    To create a proper cup of English tea, the water used must be freshly boiled. This ensures a clean taste and proper steeping. Tap water might contain impurities, so it’s advisable to use filtered or bottled water. As the saying goes, “The proof is in the pudding,” and in this case, the quality of the tea starts with the water.

    Once the water is boiled, let it cool for a minute or two before pouring it over the tea leaves. This slight cooling period helps prevent over-steeping, which can lead to a bitter taste. The ideal temperature for brewing black tea is around 90-95 degrees Celsius, so the brief pause ensures you don’t scald the leaves.

    Selecting the Right Tea Leaves

    Choosing the right tea leaves is a personal preference, but certain types are better suited for traditional English tea. Black tea, like Assam or Darjeeling, is a classic choice for its robust flavor. You can also experiment with Earl Grey, which has a hint of bergamot, or English Breakfast, known for its rich and hearty profile.

    If you’re using loose-leaf tea, measure one to two teaspoons for each cup, plus an extra teaspoon “for the pot.” This traditional saying helps achieve the perfect balance. If you prefer tea bags, choose high-quality ones with ample room for the leaves to expand during steeping.

    Consider visiting a specialty tea shop or ordering from reputable online sources to explore a wide range of loose-leaf teas. Experiment with different blends to find your favorite. If you’re unsure where to start, try a sampler pack that includes various types of tea.

    The Art of Brewing

    Proper brewing requires patience and precision. Place the tea leaves in a teapot or infuser, then add the hot water. It’s essential to let the tea steep for the right amount of time—usually two to three minutes for black tea. Over-steeping can result in a bitter cup, while under-steeping may lead to a weak brew. If you’re not sure about the steeping time, start with two minutes and adjust based on your taste.

    During the brewing process, resist the urge to stir or press the tea leaves. This can release tannins, making the tea overly bitter. Instead, let the tea steep naturally to develop its full flavor. Consider investing in a tea timer to ensure you don’t over-steep. Tea timers are simple tools that can help you achieve consistent results.

    The Importance of the Right Cup

    The right teacup or mug enhances the tea-drinking experience. A proper teacup should have a wide mouth to allow the tea to cool slightly before sipping. It also helps release the tea’s aroma, adding to the sensory experience. A classic porcelain teacup with a handle is ideal, but you can also use a sturdy ceramic mug for a more casual approach.

    The cup’s size should be appropriate for the amount of tea you plan to serve. A standard teacup holds about 6 to 8 ounces, while a larger mug can hold up to 12 ounces. Choose a cup that feels comfortable in your hand and complements the ambiance of your tea time.

    Some tea enthusiasts collect unique or vintage teacups, adding a touch of nostalgia to their tea-drinking experience. If you’re interested in starting a collection, look for teacups at antique stores, flea markets, or online marketplaces.

    Embracing Tradition: Milk and Sugar

    Many English tea enthusiasts enjoy their tea with milk and occasionally a touch of sugar. The milk-to-tea ratio depends on personal taste, but a common practice is to add a small amount of milk before pouring the tea. This technique is said to prevent the milk from “scalding,” creating a smoother blend. Adding milk to tea can also help cool the tea to a drinkable temperature.

    Sugar is optional, but if you prefer a sweeter tea, start with half a teaspoon and adjust to taste. Other sweeteners, such as honey or agave syrup, can be used for a different flavor profile. The traditional way of serving tea with milk and sugar has been part of English culture for generations, providing a familiar and comforting experience.

    The Perfect Accompaniment: Tea Time Treats

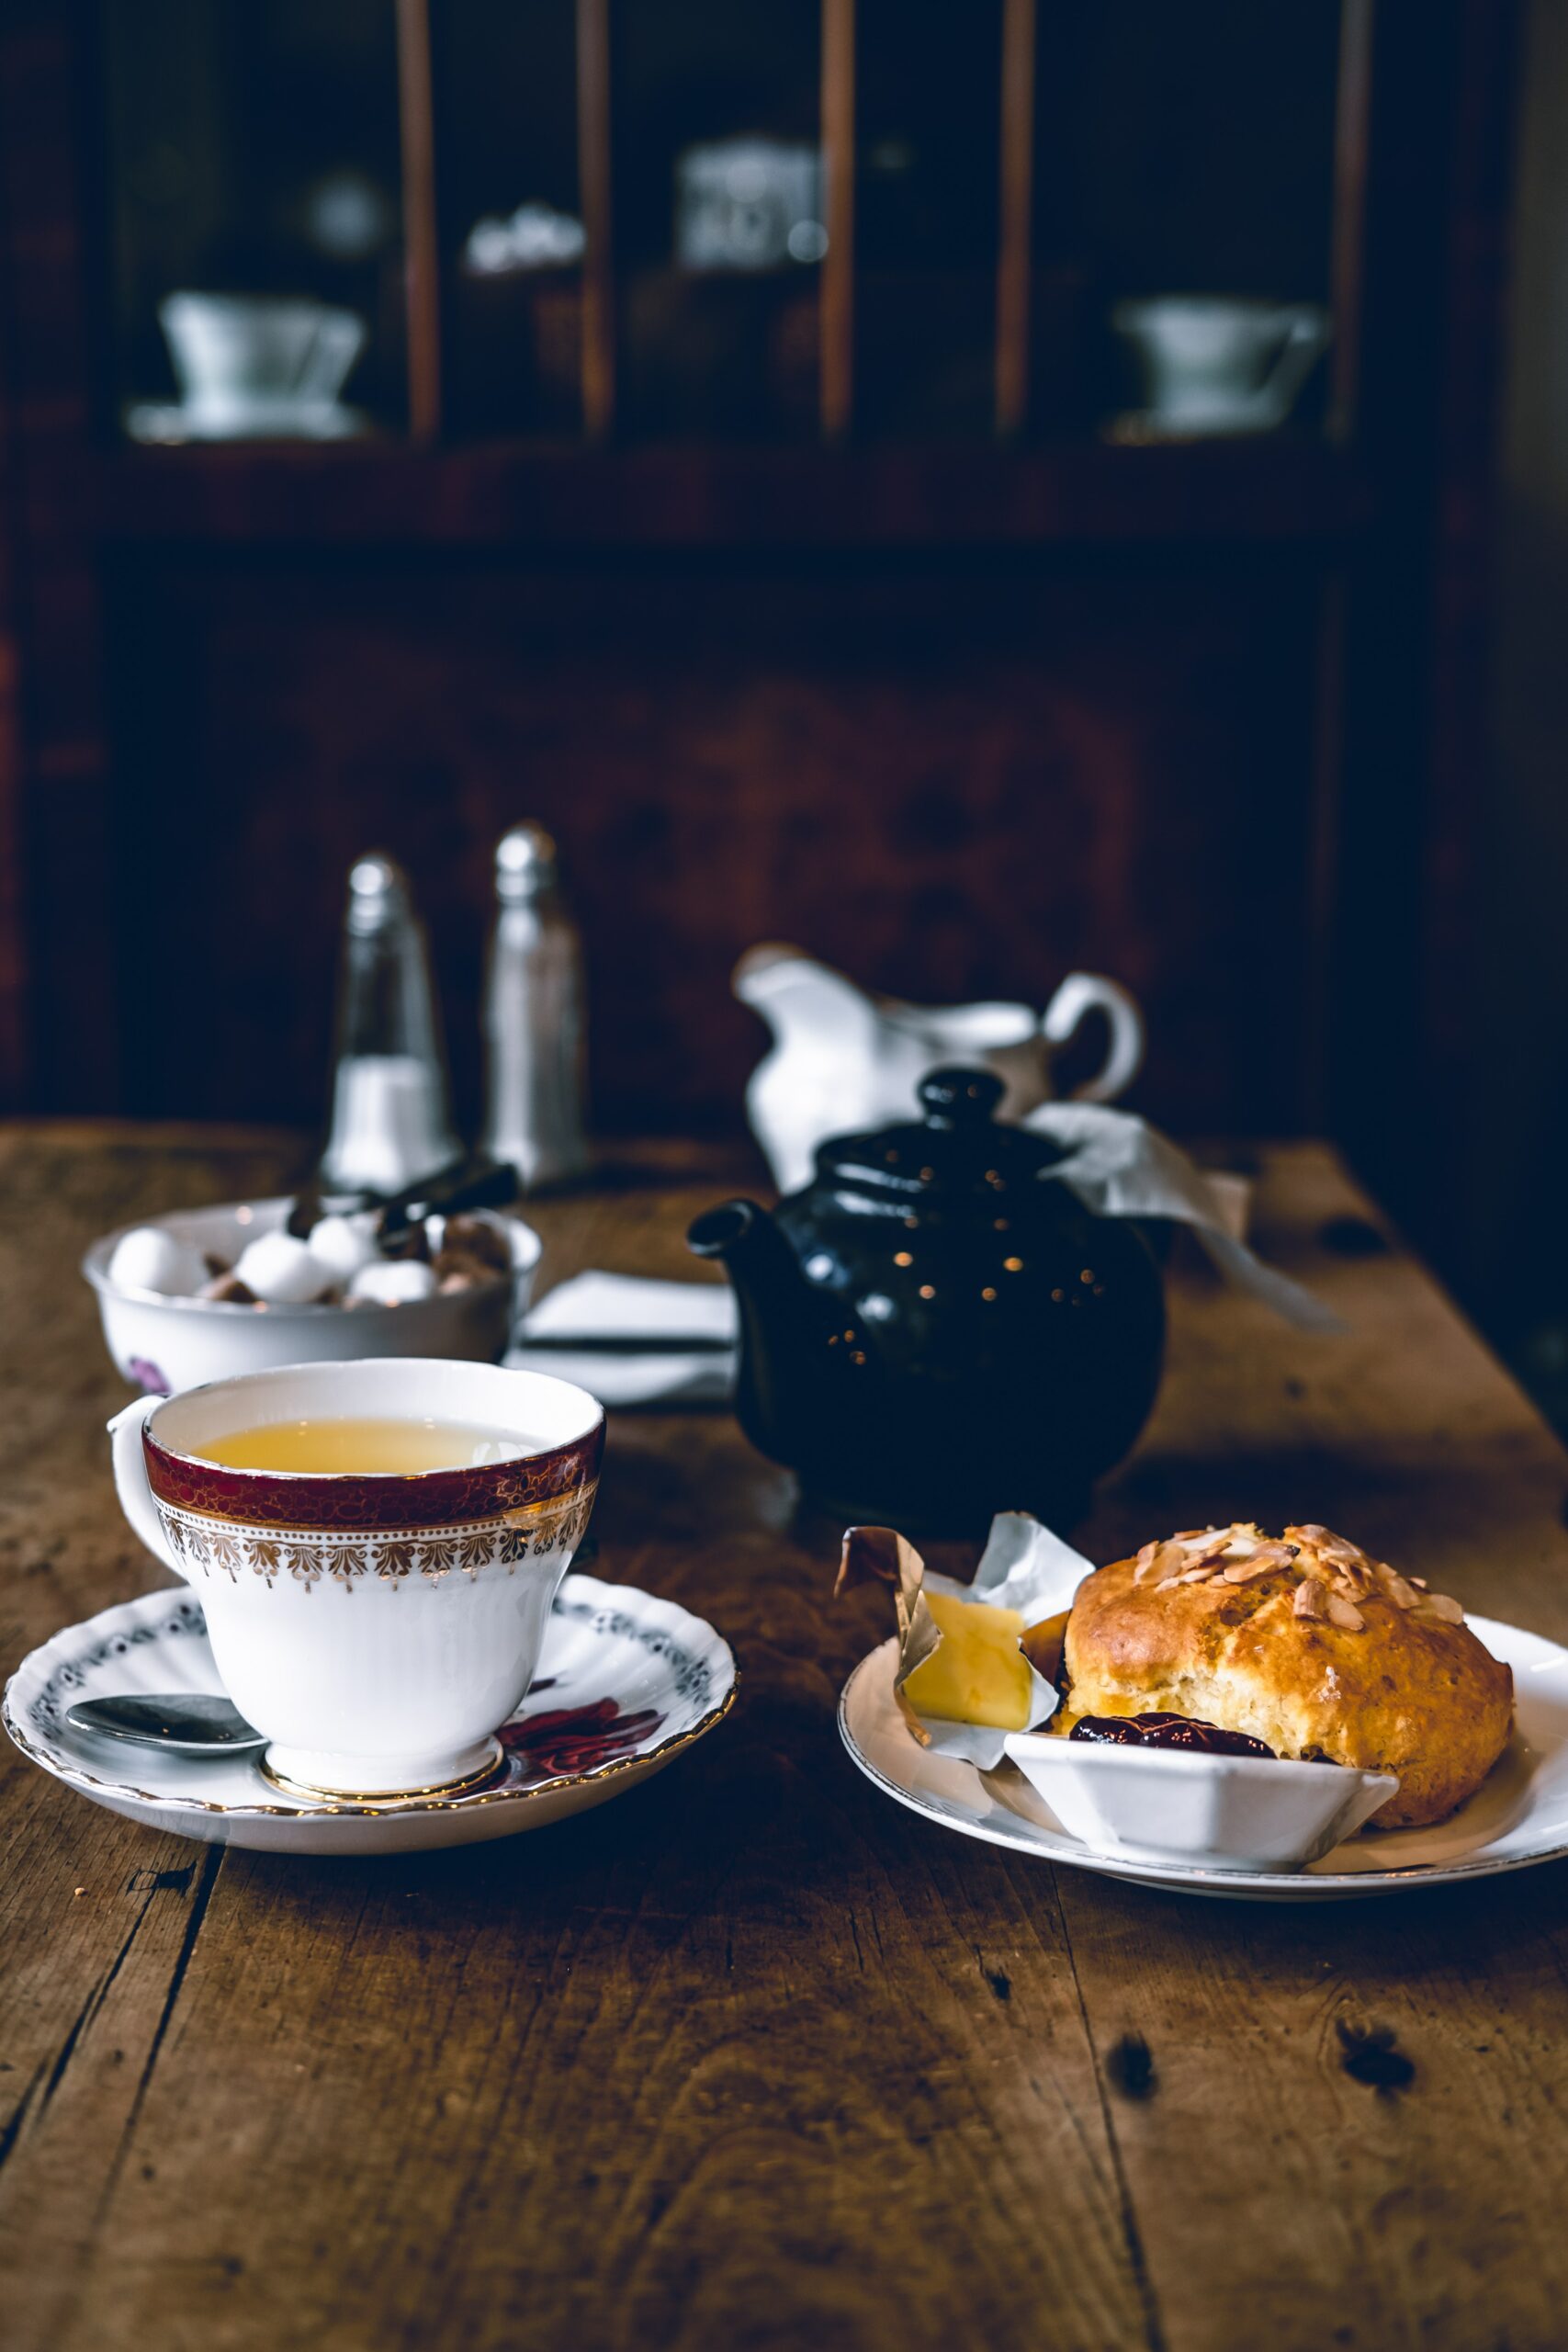
    Tea time is not complete without a delightful snack. Traditional English tea is often accompanied by biscuits, scones, or cake. These treats add a touch of indulgence and balance the tea’s flavors. For a classic tea experience, consider serving scones with clotted cream and jam, or enjoy a slice of Victoria sponge cake.

    If you’re feeling adventurous, try making your own treats. There are many recipes available for homemade scones, shortbread, or other pastries that pair perfectly with tea. Having a selection of snacks can turn a simple cup of tea into a memorable event with family and friends.

    Bringing It All Together

    To summarize, making proper English tea involves attention to detail, the right ingredients, and a touch of tradition. Start with freshly boiled water, select high-quality tea leaves, and brew with care. The right teacup, a splash of milk, and a hint of sugar (if desired) complete the experience. Don’t forget to enjoy your tea with some tasty treats and share the moment with loved ones.

    As the British saying goes, “Keep calm and drink tea.” This timeless phrase reminds us that tea is more than a beverage—it’s a way to slow down, relax, and enjoy life’s simple pleasures.

    Photo by John Tecuceanu on Unsplash

  • How to tie a tie

    How to tie a tie

    Understanding the process of properly tying a tie is a skill that should be possessed by every well-dressed individual. The art of knotting a necktie is an essential aspect of dressing up, whether for formal occasions, job interviews, or business meetings. In this comprehensive guide, the process of tying a necktie will be explained step by step, ensuring that this timeless skill is mastered.

    Knotting a necktie is a task that, surprisingly, many people find daunting. However, it’s a skill that can be acquired with practice and patience. The first step in learning how to knot a necktie is selecting an appropriate necktie. The necktie should be draped around your neck with the wider end on your right side and the narrower end on your left side. It’s crucial to ensure that the tip of the narrower end is positioned slightly above your belt line.

    One of the classic knots used for knotting a necktie is the Windsor knot. This knot, known for its elegance and symmetry, is perfect for formal events, business meetings, and presentations. To knot a necktie using the Windsor knot, you should begin by crossing the wider end over the narrower end, creating an “X” shape just below your chin.

    After the initial cross, the wider end is then passed behind the narrower end, moving from right to left. Subsequently, bring the wider end back to the right side by crossing it over the front of the knot. At this point, the wider end should be positioned on the right side again.

    The next step involves passing the wider end up and through the loop that is formed around your neck. It’s essential to hold the knot with one hand while carefully pulling the wider end down to tighten the knot. Gently slide the knot up towards your collar for a snug fit.

    With the Windsor knot, the result should be a symmetrical and well-tightened knot. If necessary, you can adjust the length of the necktie by pulling the narrower end down slightly. Remember that practice is key when it comes to knotting a necktie perfectly.

    One useful tip is to practice knotting a necktie in front of a mirror. This way, you can see exactly how the knot is forming and make necessary adjustments. Don’t be discouraged if it takes a few attempts to get the knot just right. Over time, you’ll develop the finesse required to knot a necktie effortlessly.

    Another popular knot for knotting a necktie is the Four-in-Hand knot. This knot is slightly less formal than the Windsor but is versatile and suitable for various occasions. To knot a necktie using the Four-in-Hand knot, follow these steps:

    1. Start with the wider end on your right and the narrower end on your left, just as you would for the Windsor knot.
    2. Cross the wider end over the narrower end to create an X-shape below your chin.
    3. Wrap the wider end behind the narrower end, moving from right to left.
    4. Bring the wider end back to the right side, crossing it over the front of the knot.
    5. Now, pass the wider end up and through the loop around your neck.
    6. Hold the knot with one hand and gently pull the wider end down to tighten the knot. Adjust the length as needed.

    The Four-in-Hand knot is known for its slightly asymmetrical appearance, which gives it a more casual and relaxed look. It’s a great choice for everyday wear and less formal occasions.

    As you continue to practice knotting different knots, you’ll gain confidence and efficiency in the art of necktie knotting. Each knot has its unique charm, and you can choose the one that best suits your outfit and the occasion.

    In conclusion, mastering the art of knotting a necktie is a valuable skill that can boost your confidence and leave a lasting impression in various situations. Whether you opt for the classic Windsor knot or the versatile Four-in-Hand knot, remember that practice is the key to perfection. With patience and dedication, you’ll become a pro at knotting a necktie like a true gentleman.

    So, whether you’re dressing up for a formal occasion, a job interview, or simply want to look your best for a day at the office, you now have the knowledge you need to tie a tie with elegance and style.

    Photo by Brock Wegner on Unsplash

  • How to charge your phone

    How to charge your phone

    Charging your phone is an essential part of owning a smartphone, and it is important to know how to do it in order to keep your device running properly. Fortunately, the process of charging your phone is straightforward and easy to understand.

    The first step is to make sure you have a compatible charger. Most phones come with a USB cable and an adapter, which you can plug into a wall outlet or a computer. If your phone does not come with a charger, you can purchase one that is compatible with your device.

    Once you have a compatible charger, connect it to your phone. Depending on your device, you may have to press a button or switch on the phone to begin charging. When your phone is connected, the charging icon will appear on the display to let you know that the process has started.

    Next, leave your phone to charge. Depending on the type of charger, it may take several hours for your phone to reach a full charge. It is best to leave your phone plugged in until it is completely charged, as the battery will last longer if it is fully charged.

    Finally, when your phone is fully charged, you can disconnect the charger and resume using your device. It is important to remember that it is normal for your phone to become warm while charging. If your phone gets too hot, you should unplug it and let it cool down before using it again.

    By following these simple steps, you can ensure that your phone is charged and ready for use. Charging your phone regularly is a great way to keep your device running smoothly, and you can enjoy using it for longer.

    Charging your phone doesn’t have to be complicated. Here are some easy steps to keep your device powered up and ready to go:

    1. Connect your phone to a charger. Most phones use USB-C or Micro USB, so make sure you have the right cable for your device.

    2. Plug the cable into a power source. You can use an AC adapter, laptop, or even a power bank to charge your phone.

    3. Make sure your phone is in the right position. Some phones have specific charging ports, so check your device’s manual for details.

    4. Wait for your phone to charge. Depending on your device, it may take several hours to fully charge.

    5. Unplug your phone when it’s finished charging. Don’t leave it connected for too long, as this can cause damage.

    Following these simple steps will help keep your phone charged and ready to go.

    How to Charge Your Phone

    In today’s world, having a fully charged phone is essential. We rely on our phones for communication, entertainment, and navigation, so it’s important to keep them charged. Whether you’re dealing with an iPhone or an Android, here are some tips and tricks to get the most from your phone’s battery life.

    The first step is to figure out which type of charger your phone uses. Generally, most phones use either a micro USB or USB-C charging port. If you’re not sure which one your phone uses, check your phone’s manual or look it up online.

    Next, you’ll need to find a compatible charger. Most phones come with a charger, but if you’ve lost yours or need a replacement, you can also purchase one from a local electronics store. Make sure you get the right type for your phone, as some chargers aren’t compatible with certain devices.

    Once you’ve got the right charger, plug the USB cable into your phone. The other end should be plugged into a power outlet or a computer. If your phone is low on battery, it should start charging immediately.

    If you want to maximize your battery life, make sure to avoid overcharging your phone. This means unplugging it once it’s done charging and not keeping it plugged in all night. This can help to prevent battery degradation and maximize your phone’s lifespan.

    Another tip to maximize your phone’s battery is to turn off unnecessary features. This includes your WiFi and Bluetooth, as well as your GPS and other location services. Disabling these features can help to reduce battery drain and extend your phone’s battery life.

    Finally, if your phone’s battery is running low and you don’t have access to a power outlet, you can always try using a power bank. A power bank is a portable battery charger that can be used to charge your phone on the go. They’re available in a variety of sizes and capacities, so you can find one that’s perfect for your needs.

    By following these tips, you can make sure that your phone is always charged and ready to go. Whether you’re dealing with an iPhone or Android, keeping your phone charged is essential in today’s digital world. So make sure you’re prepared and always have a charger handy.

    Photo by cottonbro studio

  • How to clean a monitor without streaks

    How to clean a monitor without streaks

    Cleaning a monitor without streaks is a skill that every computer user should possess. A streak-free monitor not only enhances your viewing experience but also prolongs the life of your screen. In this comprehensive guide, we will explore various techniques and tips to help you clean your monitor effectively without leaving unsightly streaks.

    It’s essential to emphasize that cleaning your monitor is not just about aesthetics; it’s also about maintenance. A clean monitor ensures that you see your content clearly, without distractions caused by smudges and streaks. Let’s delve into the best practices for keeping your screen spotless:

    The Importance of Using the Right Materials

    Before we dive into the cleaning process, it’s crucial to gather the right materials. Using improper materials can lead to scratches or further smudging. Here’s what you’ll need:

    • Microfiber Cloth: This is your best friend when it comes to cleaning a monitor without streaks. Microfiber is gentle on the screen and effectively picks up dust and fingerprints.
    • Diluted Isopropyl Alcohol: A mixture of distilled water and isopropyl alcohol (70% or less) can be used for stubborn stains. However, it should be used sparingly.
    • Distilled Water: For general cleaning, distilled water works wonders. It doesn’t contain minerals that can leave residue on your screen.

    Now that you have the right materials, let’s move on to the cleaning process:

    Cleaning Your Monitor Step by Step

    1. Power Off and Unplug: Before you start, turn off your monitor and unplug it from the power source. This ensures your safety and prevents any electrical damage.

    2. Dust Removal: Begin by gently dusting the monitor’s surface with a dry microfiber cloth. This step removes loose particles that can scratch the screen during the cleaning process. Wipe from top to bottom with light, even strokes.

    3. Dampen the Cloth: Moisten a corner of your microfiber cloth with distilled water or the water-alcohol mixture. It should be damp but not dripping wet.

    4. Clean the Screen: Gently wipe the monitor’s surface in a circular motion, starting from the top and working your way down. Use light pressure to avoid damaging the screen. If you encounter stubborn stains, apply a bit more pressure but be cautious not to overdo it.

    5. Dry with a Dry Cloth: After cleaning, use a separate dry part of the microfiber cloth or a different dry cloth to remove any remaining moisture. Again, wipe gently in a top-to-bottom motion.

    6. Check for Streaks: Inspect the screen from different angles to ensure there are no streaks or smudges left behind. If you notice any, repeat the cleaning process using a fresh microfiber cloth.

    Preventing Future Streaks

    Now that your monitor is clean and streak-free, it’s essential to maintain it that way:

    • Regular Dusting: Dust your monitor regularly with a dry microfiber cloth to prevent the buildup of dirt and particles.
    • Keep Hands Clean: Avoid touching the screen with your fingers as oils and dirt from your skin can leave smudges.
    • Monitor Placement: Position your monitor away from direct sunlight or harsh lighting to reduce the visibility of streaks.

    In conclusion, knowing how to clean a monitor without streaks is a valuable skill for any computer user. With the right materials and techniques, you can enjoy a pristine, crystal-clear display that enhances your computing experience. Remember to clean your monitor regularly to maintain its clarity and keep those streaks at bay.

    So, whether you’re working, gaming, or simply enjoying your favorite content, a clean and streak-free monitor ensures that you see it all with clarity and precision.

    Photo by Domenico Loia on Unsplash

  • How to nail baseboards

    How to nail baseboards

    Nailing baseboards is a fundamental step in finishing the interior of a room. Properly installed baseboards not only enhance the aesthetic appeal of your space but also serve a functional purpose by covering gaps and seams. In this comprehensive guide, we will explore the techniques and tips required for a flawless baseboard installation.

    Before diving into the installation process, it’s essential to gather the necessary tools and materials. You will need:

    • Baseboards
    • Measuring Tape
    • Miter Saw
    • Hammer or Nail Gun
    • Finishing Nails
    • Level
    • Wood Glue
    • Sandpaper
    • Coping Saw
    • Painter’s Caulk

    Once you have everything ready, follow these steps to nail baseboards:

    1. Measure and Cut the Baseboards

    Begin by measuring the length of the wall where you intend to install the baseboards. Use a miter saw to make precise 45-degree cuts at the corners for a seamless fit. Remember that the baseboards should be cut at a slight angle to ensure a snug joint at the corners.

    2. Apply Wood Glue

    Apply wood glue to the back of the baseboards before nailing them in place. This added adhesive will provide extra support and prevent the baseboards from loosening over time.

    3. Nail the Baseboards

    Using a hammer or nail gun, nail the baseboards to the wall. Make sure to drive the nails at an angle through the baseboards and into the wall studs for a secure fit. The angle of the nails helps prevent splitting of the baseboards.

    Passive voice can be used effectively in this step: “The baseboards should be nailed to the wall with care, ensuring that they are securely fastened.”

    4. Check for Level

    Use a level to ensure that the baseboards are straight and level along the wall. Adjust as needed by tapping the baseboards with a mallet or adding shims behind them.

    Transition words like “Additionally,” “Moreover,” and “Furthermore” can be used to enhance the flow of the instructions.

    5. Fill Nail Holes and Gaps

    After nailing the baseboards, use wood filler to fill any nail holes or gaps between the baseboards and the wall. Sand the filled areas once they are dry to create a smooth surface.

    Passive voice can be integrated: “Nail holes and gaps should be filled with wood filler, and once dry, they should be sanded.”

    6. Coping Inside Corners

    Inside corners of rooms often require coping to create a seamless joint. Use a coping saw to carefully cut along the profile of the baseboard where it meets the adjoining piece. The coped joint should fit snugly, allowing for a smooth transition.

    7. Caulk the Gaps

    Apply painter’s caulk to any remaining gaps between the baseboards and the wall. This not only creates a finished look but also prevents drafts and dust from entering the gaps.

    Transition words like “Additionally,” “Furthermore,” and “Consequently” can be used to improve the article’s flow.

    8. Sand and Paint

    Once the caulk is dry, sand the entire baseboard surface to create a smooth and even finish. After sanding, apply paint or stain to match the room’s decor. Multiple coats may be necessary for full coverage.

    9. Final Inspection

    Inspect the installed baseboards for any imperfections or areas that may require touch-ups. Make necessary adjustments and ensure that the baseboards are securely attached to the wall.

    In conclusion, properly nailing baseboards is essential for achieving a polished and professional look in any room. By following these steps and using the right tools and materials, you can complete this task with confidence. Whether you’re renovating or enhancing the aesthetics of your space, a well-executed baseboard installation adds the perfect finishing touch.

    So, whether you’re a DIY enthusiast or a homeowner looking to improve your living space, mastering the art of nailing baseboards is a valuable skill that enhances the overall appeal of your home.

    Image by Freepik